Bids are how you get work. Build a proposal, send it to the customer, and when they accept, convert it straight to a job. The deposit invoice auto-generates on acceptance, so you don’t have to chase the deposit step manually.
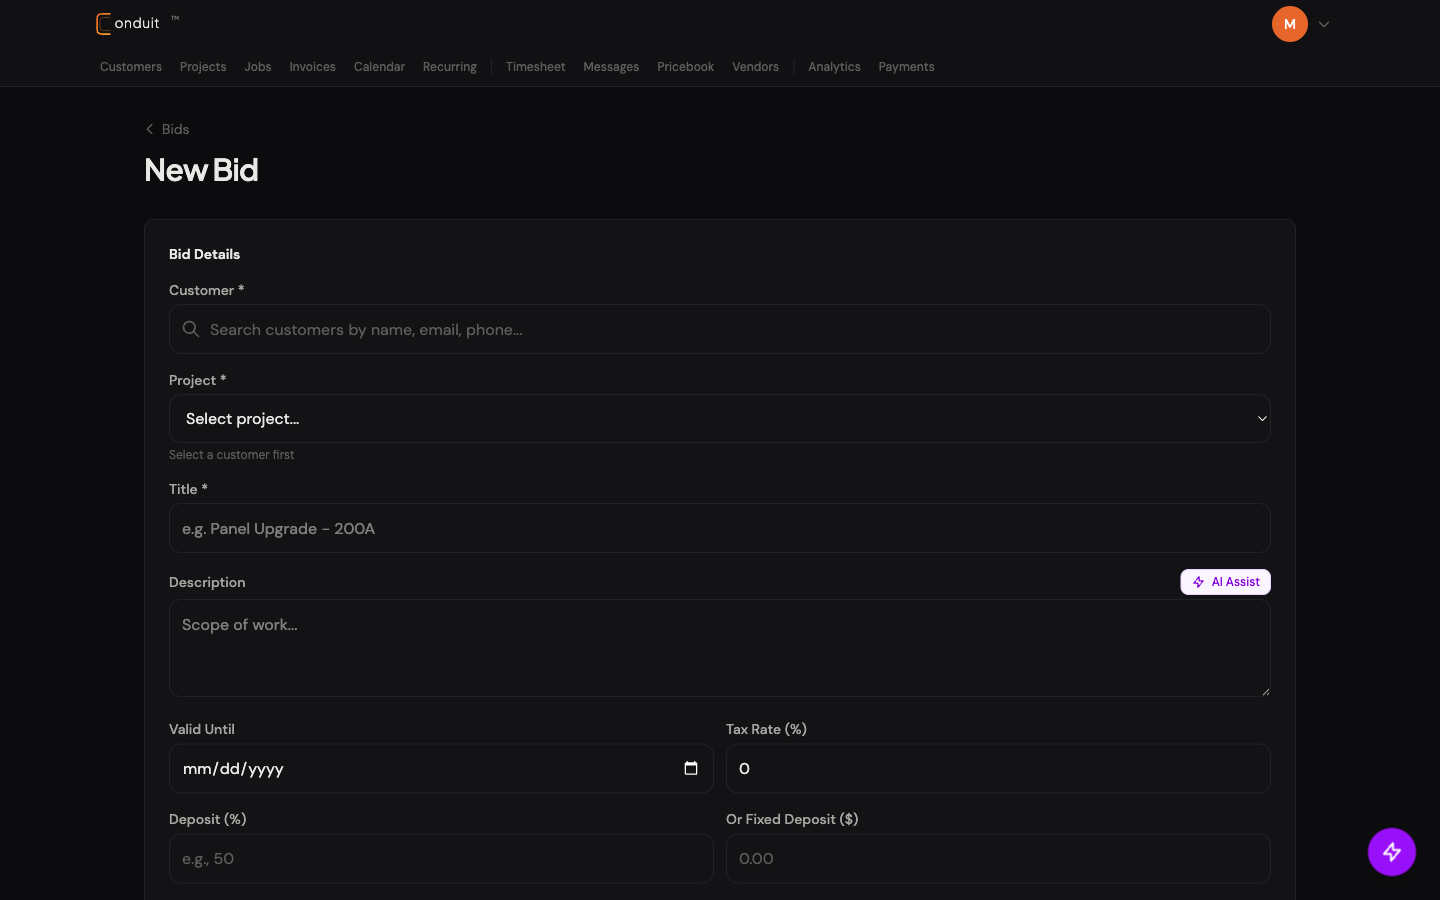
01Create the bid
From the Bids page or a project’s Bids tab, click + New Bid.
- Customer. Required. Search by name, email, or phone.
- Project. Required. The dropdown is scoped to the selected customer’s projects.
- Title. Descriptive: “Kitchen Remodel Electrical,” “Panel Upgrade, 200A,” etc.
- AI Assist. One click drafts the Description from your Title plus project context. Edit the result before saving; it’s a starting point, not a final draft.
- Description. Scope of work in plain prose. Customer sees this on the bid PDF and public bid view.
- Valid Until. Optional expiration date for the pricing.
- Tax Rate (%). Default for taxable line items on this bid. Override per-bid if a job is in a different jurisdiction.
- 1. Customer search
- 2. Project picker (scoped to customer)
- 3. Title
- 4. AI Assist (drafts the description)
- 5. Description
- 6. Valid Until
- 7. Tax Rate (%)
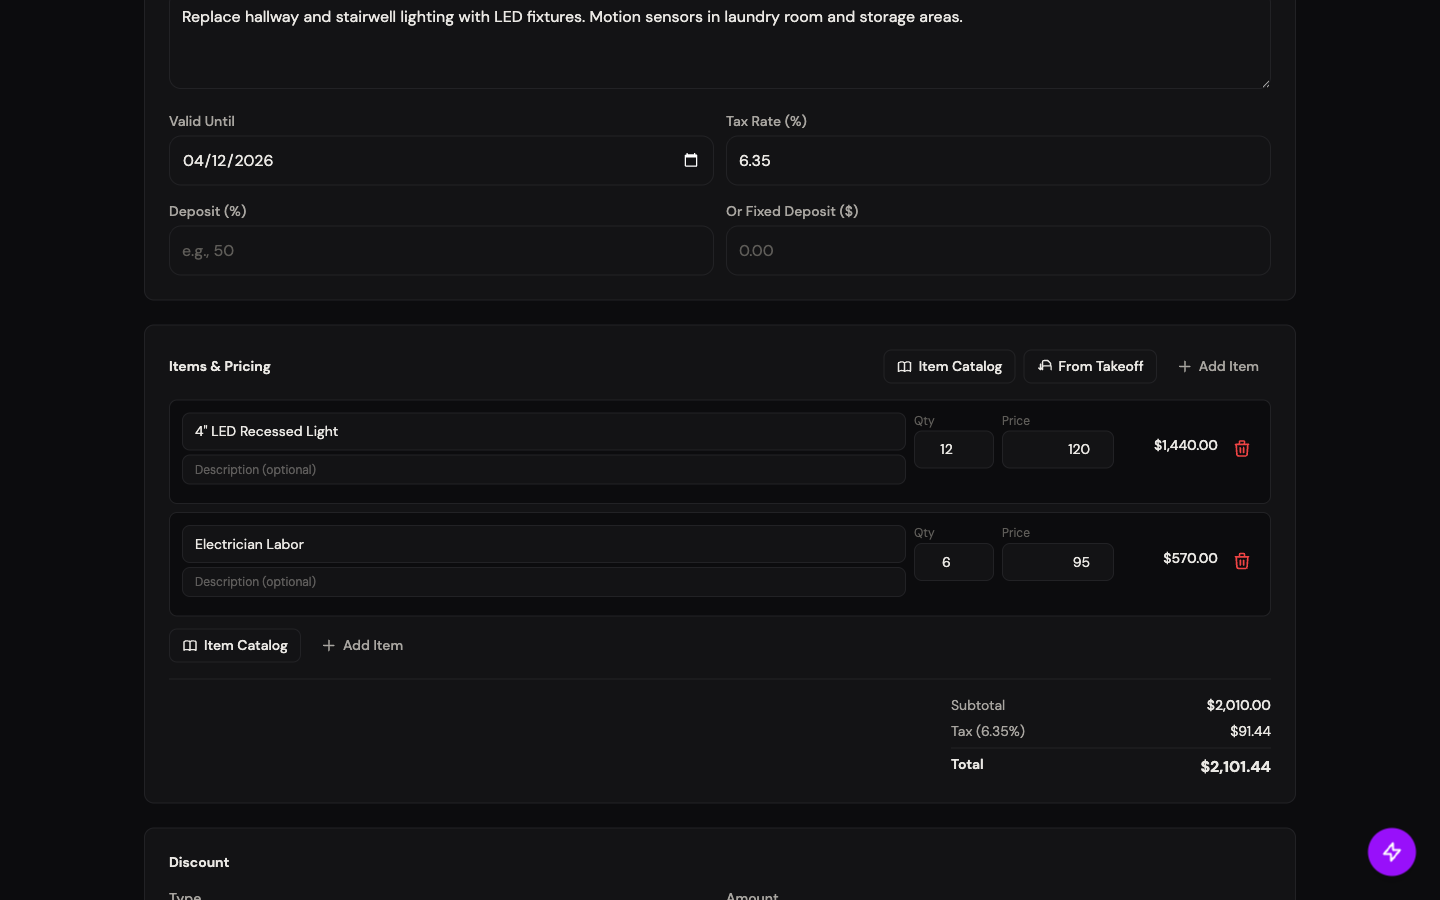
02Add line items
The Items & Pricing section gives you three ways to add lines, and three running totals that update as you type.
- Item Catalog. Opens your pricebook in a sidebar. Click any item to add it as a line; name, price, unit, and taxable flag carry over.
- From Takeoff. Pulls measured quantities directly off a plan you’ve already taken off (see Plans & Takeoff).
- + Add Item. Manual line for one-offs not in the pricebook. You can promote it into the pricebook later from the bid screen.
- Line item. Name + Description on the left, Qty + Price + line total on the right. Trash icon removes the line.
- Live totals. Subtotal, Tax (at the rate you set in tab 01), and Total all recalculate as you change quantities or prices.
- 1. Item Catalog (your pricebook)
- 2. From Takeoff (use plan measurements)
- 3. + Add Item
- 4. Line item (Name / Qty / Price / line total)
- 5. Live totals (Subtotal / Tax / Total)
03Pricing, tax, and deposit
Below the line items, the running total breaks out:
- Subtotal is the sum of taxable + non-taxable lines.
- Tax is calculated only on taxable items, at your default rate (override per-bid if needed).
- Discount is an optional flat dollar discount.
- Total is the grand total.
- Deposit requirement is a percentage of total OR fixed dollar amount. When the customer accepts, Conduit auto-generates a deposit invoice for this amount.
04Discount, documents, and terms
Below the line items, the bid form has three more sections before save.
- Discount. Type (Fixed $ or %) plus Amount. Subtracts from the subtotal before tax.
- Project Documents. Drop in plans, photos, contracts, anything PDF/image-shaped that the customer should see attached to the bid.
- Customer Message. Free-text note the customer sees at the top of the bid PDF and the public bid view.
- Terms & Conditions. Payment terms, warranty info, anything legally binding. Also visible to the customer on the PDF.
- Update Bid. Save. New bids land in Draft status; existing bids save in place.
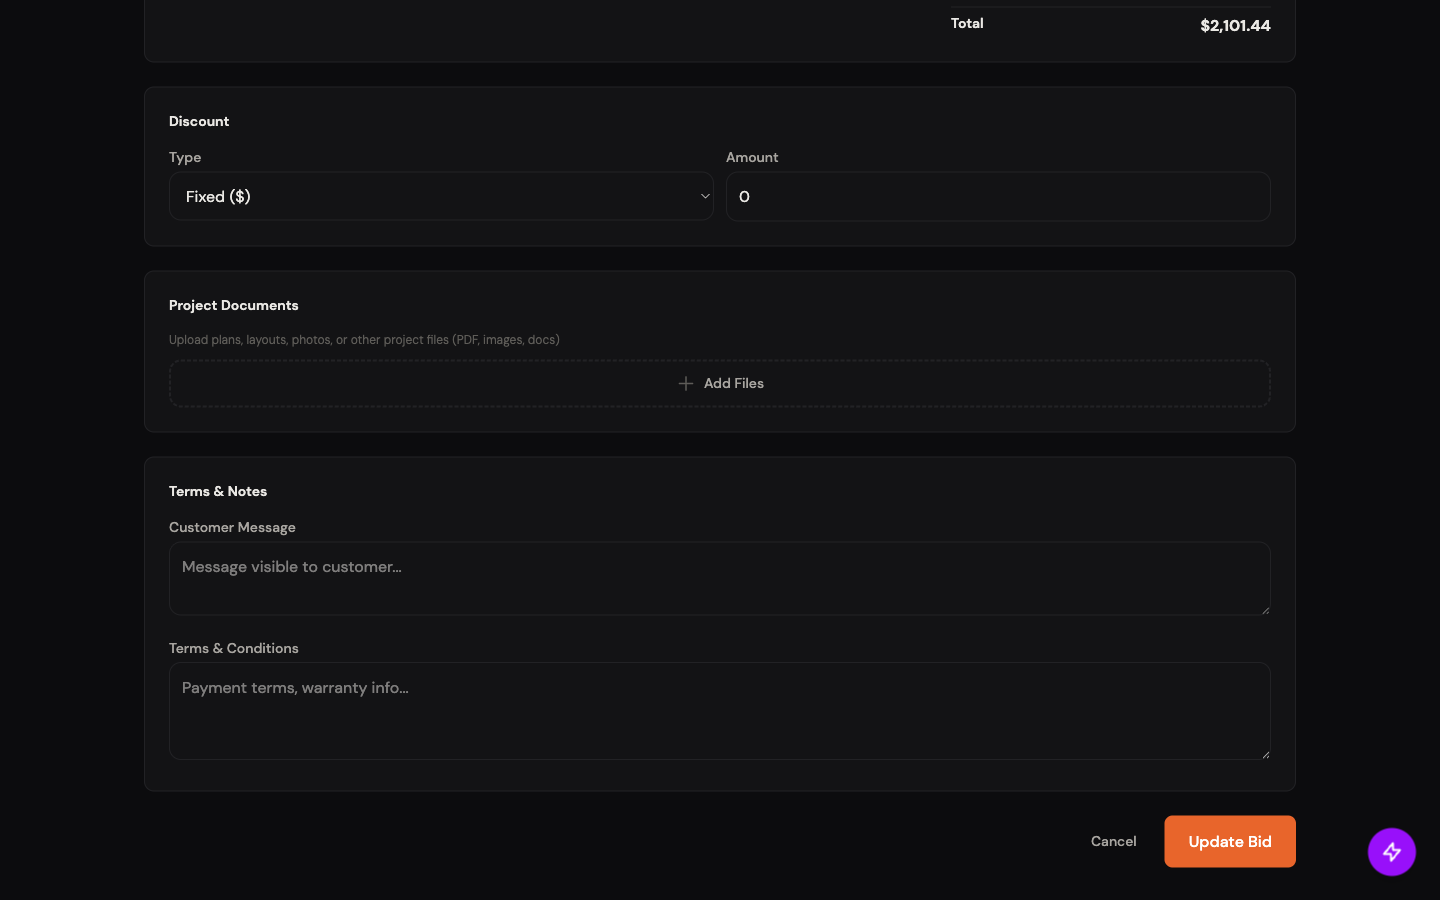
- 1. Discount (Fixed $ or %)
- 2. Project Documents (attach plans, photos, PDFs)
- 3. Customer Message (visible to customer)
- 4. Terms & Conditions (visible to customer)
- 5. Update Bid (save)
05Send and track
After save, Conduit opens a Bid Created! modal. Choose Send to customer now to go straight to the bid detail and send it, or View bid to review before sending. On the bid detail page, five things matter.
- Status badges. Sent + Expired chips show the lifecycle state. Status flips automatically: Draft → Sent → Viewed (when customer opens) → Accepted/Declined.
- Mark Accepted / Mark Declined. Manual override for when the customer responds in person or by phone.
- Send Bid. Three buttons: Send via Text (SMS with link), Send via Email (link + PDF attached), Send All (both at once).
- Share with Customer. Share button copies the public bid link so you can paste it into your own message thread or hand it off in person.
- Customer block. Contact details for the bid recipient, including name, email, and phone, pulled from the customer record.
The customer’s bid view is clean and branded. They see your logo, the line items, totals, deposit info, and terms. They can Accept or Decline right there, and your status flips in real time.
- 1. Status badges (Sent + Expired)
- 2. Mark Accepted / Mark Declined (manual override)
- 3. Send Bid block (Text / Email / Send All)
- 4. Share with Customer (public link)
- 5. Customer block (contact details)
06Convert to a job
When the customer hits Accept on the public bid, two things happen automatically: the status flips to Accepted, and (if you set a deposit %) a deposit invoice generates and lands in the customer’s inbox. From the bid detail, you spin up the actual work order.
- Accepted badge. Status chip flips to green.
- Acceptance banner. “This bid was accepted! Convert it to a job.” with an inline Convert to Job button.
- Convert to Job button. Standalone button below the banner with the same action, easier to find on long bids.
- Customer block. Customer contact info carries straight to the new job.
- Work Description. Carries to the job’s description field. Edit it on the bid first if you want different language on the job.
Convert to Job spins up a job with: customer + project + line items pre-filled, job title from the bid title, defaults to Schedule mode for a future start date, and the original bid stays linked so you can always trace back.

- 1. Accepted badge (green)
- 2. Acceptance banner (inline Convert to Job)
- 3. Convert to Job (standalone button)
- 4. Customer block (carries to job)
- 5. Work Description (carries to job)
That’s bids. Next: Plans and Takeoff for the visual measurement tools.