Customers are the starting point for everything in Conduit. Projects, jobs, bids, invoices, recurring schedules, all of it ties back to a customer. Before you can do almost anything else, you need at least one customer in the system.
You have three ways in: one at a time, bulk import from a spreadsheet, or photo-scan a handwritten list. Walk each tab.
01The customer list
Open Customers in the top nav. You see your full list with search, filter chips, and quick actions.
- Search bar. Filters by name, email, or phone as you type.
- Type filter chips. All / Residential / Commercial / Property Mgr / Show Archived. The active chip is orange.
- Status dot. Green next to active customers, gray for inactive, red for archived.
- Inline contact info. Phone (orange = clickable), email, and outstanding balance show right in the row.
- Add Customer. Top right, orange. Goes to the new-customer form.
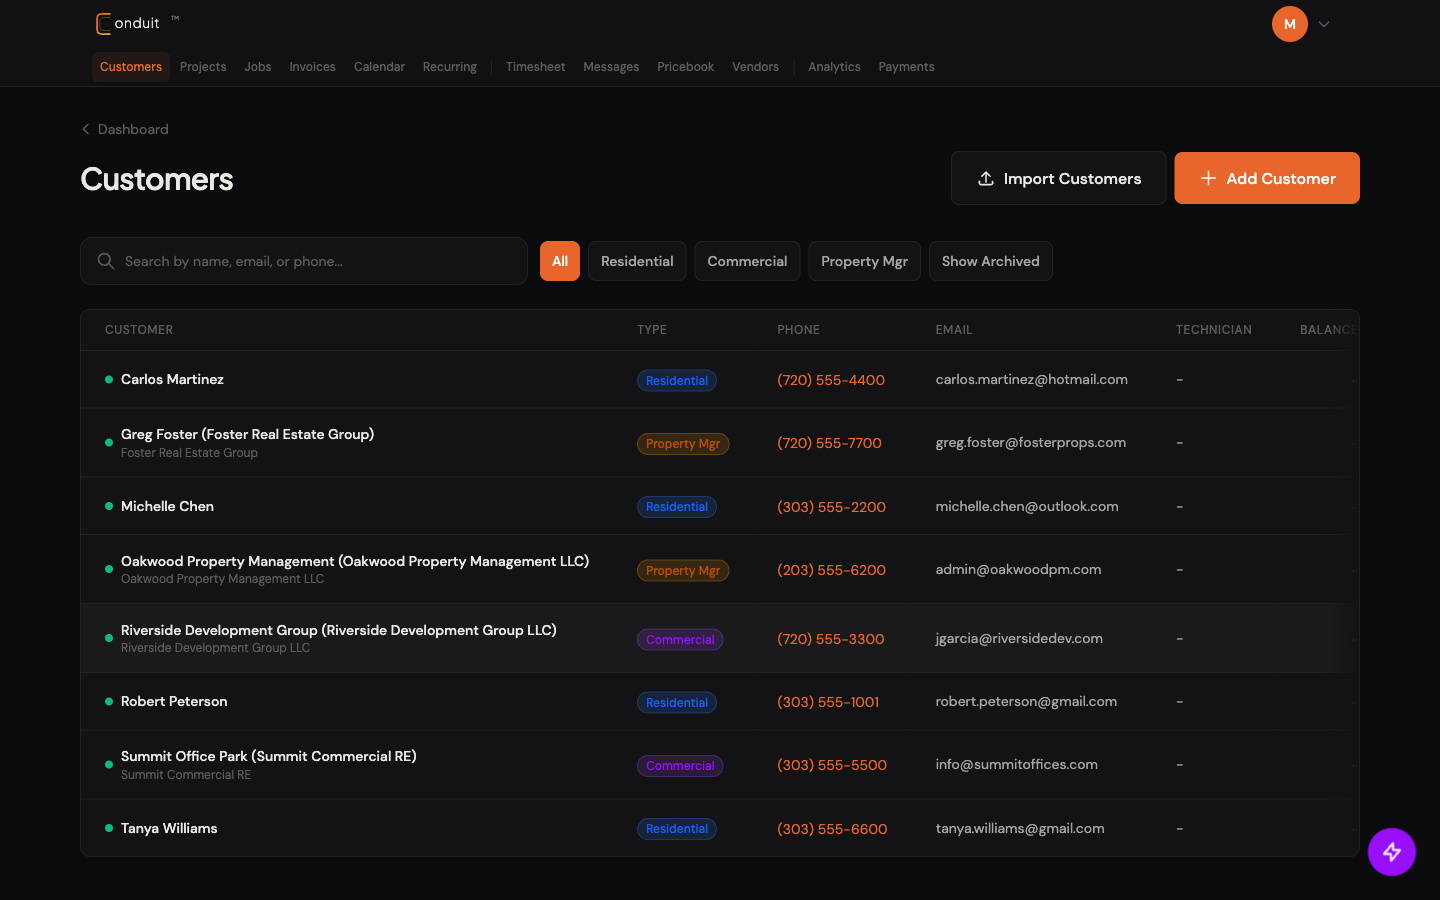
- 1. Search
- 2. Type filter chips
- 3. Status dot
- 4. Inline phone + email
- 5. + Add Customer
02Add one customer manually
Click + Add Customer in the top right of the list. The form is two layers, essentials first and optional details under a collapsible section.
- Name. First and last for residential, or company name for commercial.
- Phone. Auto-formats as you type. Paste any common format (with or without parens, dashes, country code) and Conduit normalizes it.
- Email. Used for invoice and bid notifications.
- Customer type. Residential, Commercial, or Property Manager. Drives the colored badge in the list and some downstream defaults.
- Create Customer. Bottom right, orange. Save and move on.
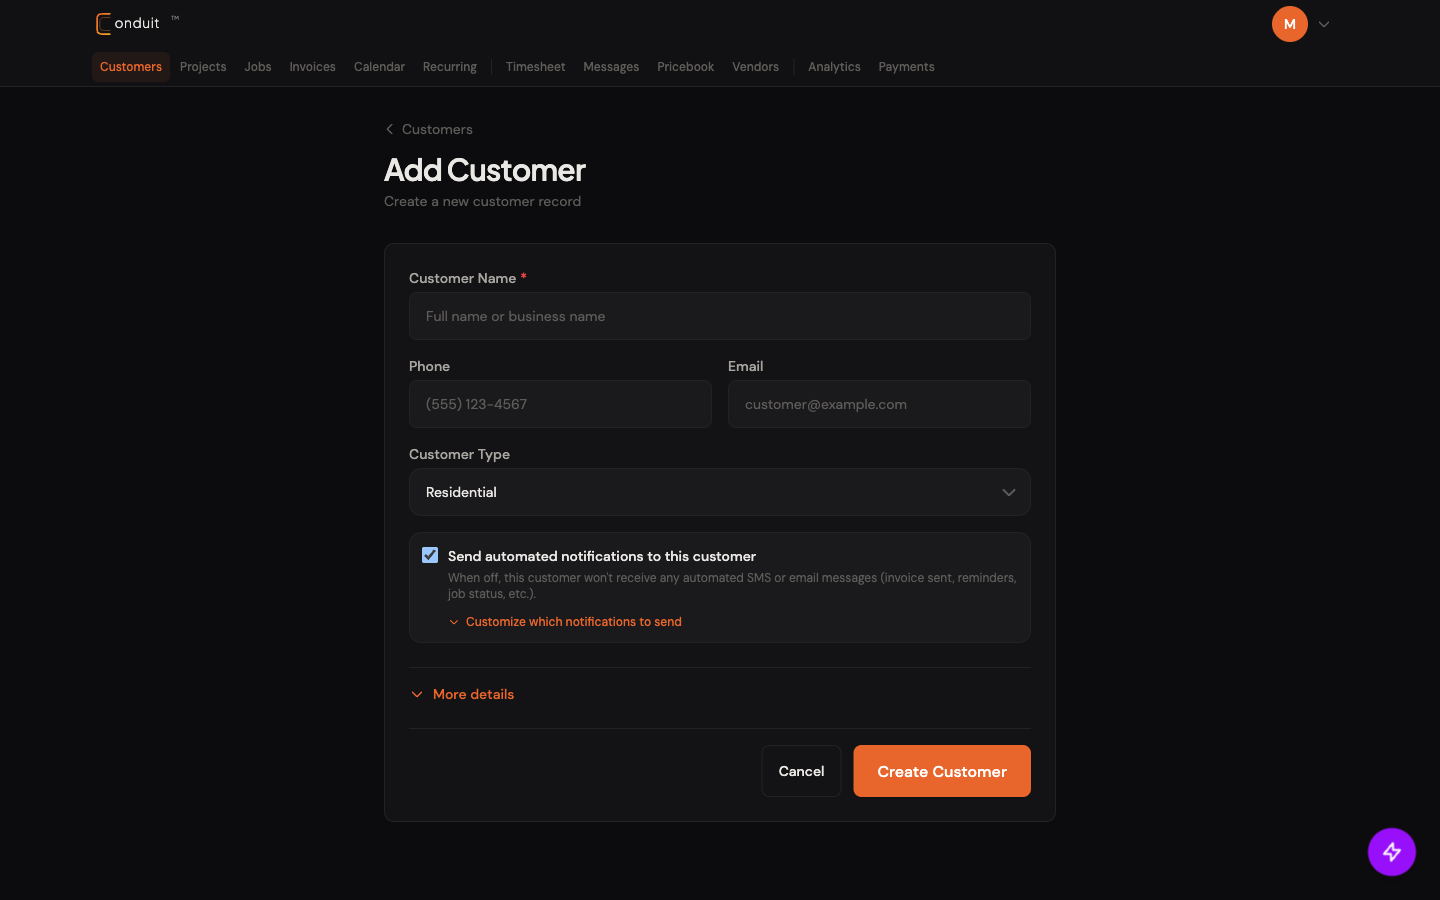
- 1. Name
- 2. Phone
- 3. Email
- 4. Customer type
- 5. Create Customer
After save, Conduit asks What next? with two buttons: add a project, or schedule a job. For your first run-through, schedule a job and continue your fundamental loop.
03Bulk import from CSV or Excel
If you already have a customer list anywhere else (Housecall Pro, Jobber, ServiceTitan, QuickBooks, a spreadsheet), don’t retype. Bulk import is the fastest path in.
- Go to Settings → Import Data.
- Click the Customers card (the one labeled “Import from a spreadsheet”).
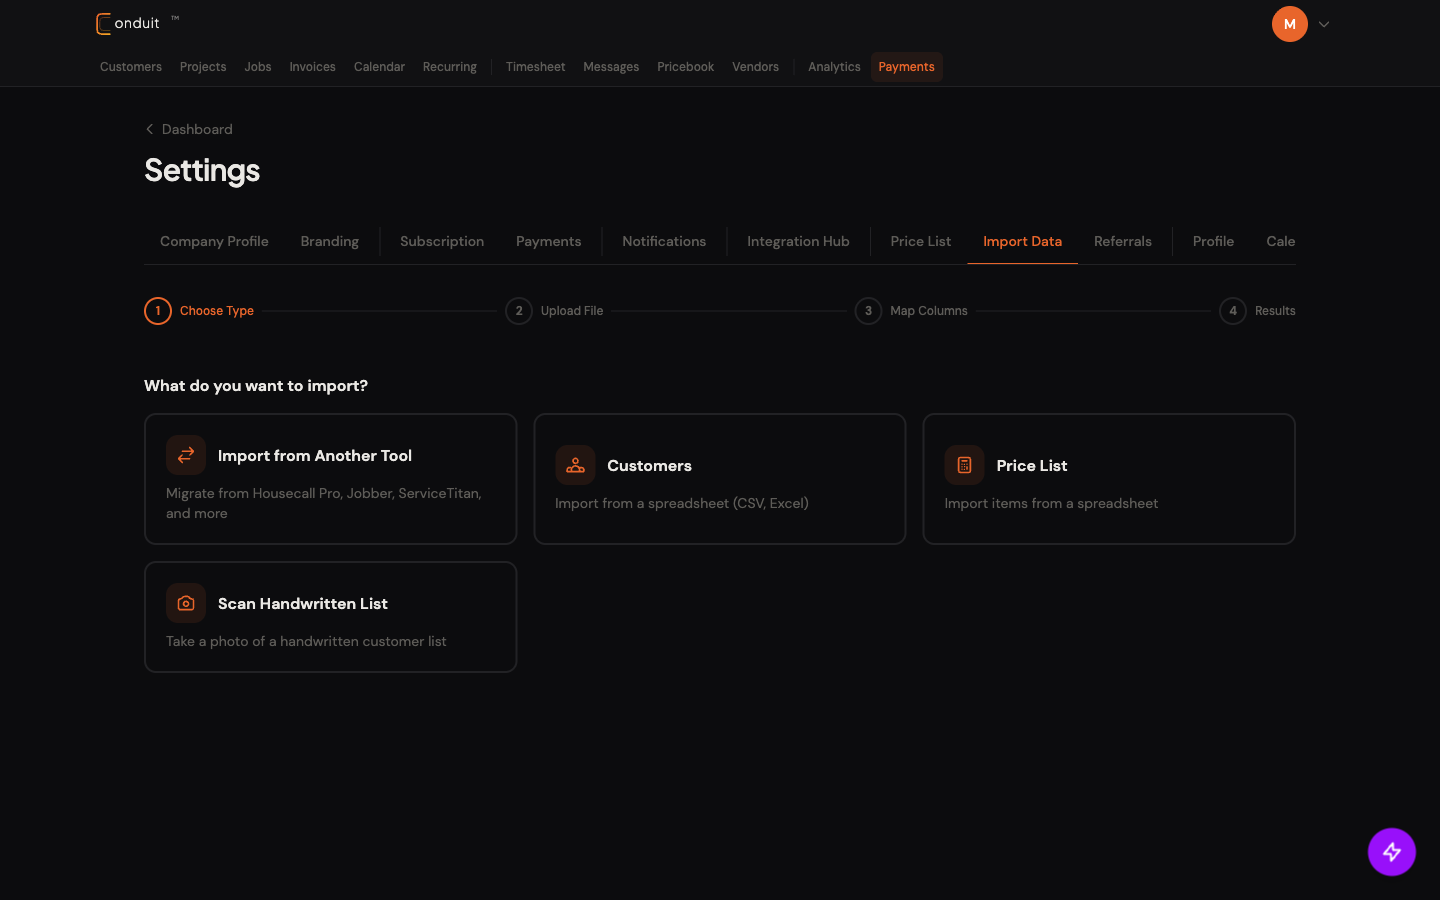
- 2. Click the Customers card
- Upload your file. CSV, XLSX, and XLS all work.
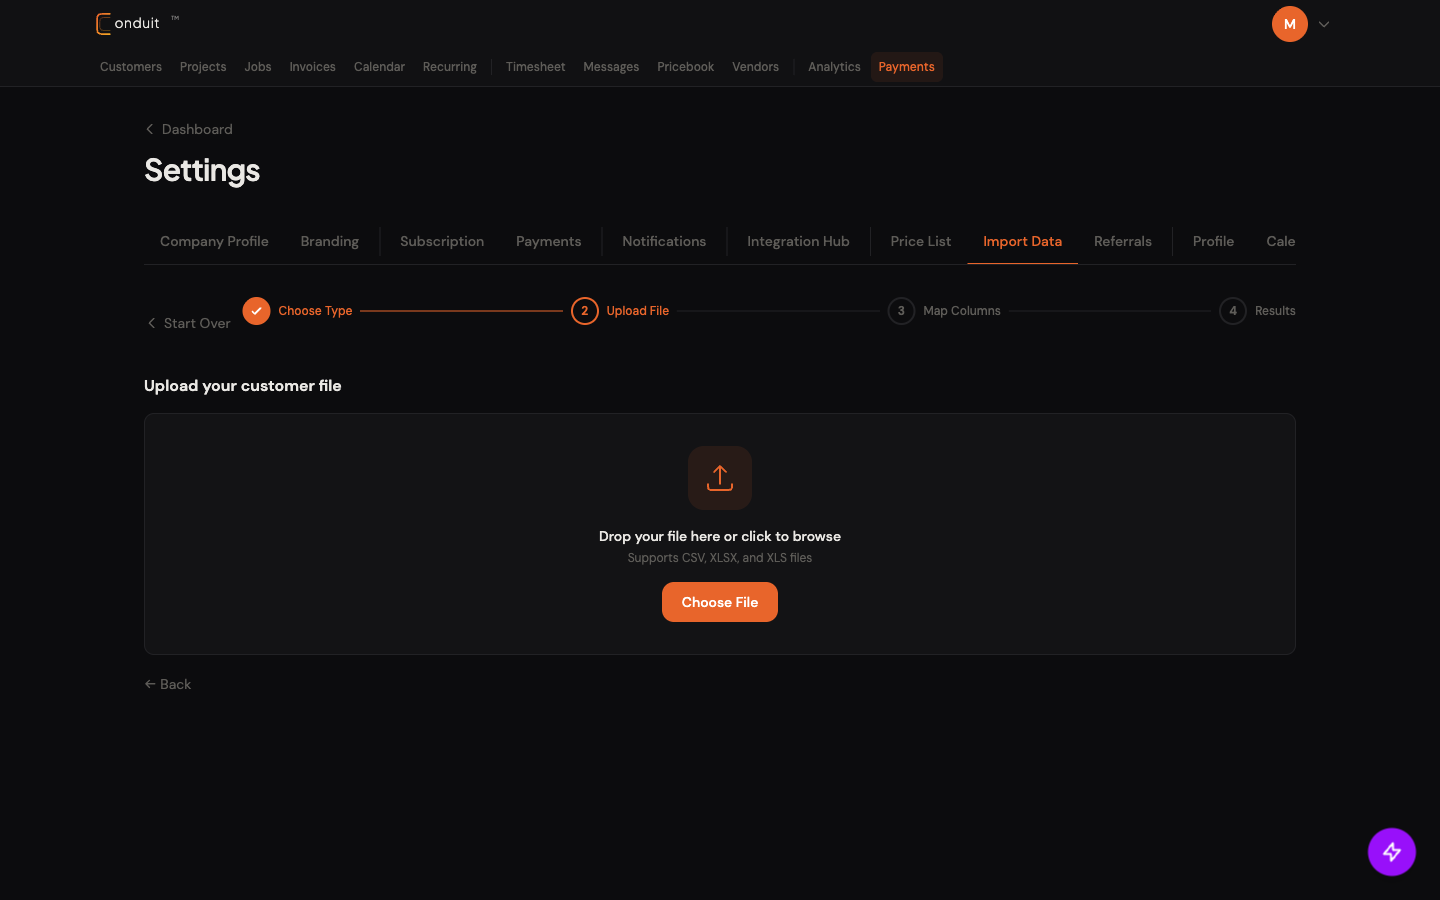
- 3. Drop or browse for your file
- Map your columns to Conduit fields. The wizard guesses based on your headers; you confirm or override each mapping.
- Preview the data, then confirm. Records land in seconds.
The full migration walkthrough, including platform-specific paths and the column-mapping screen, lives in Migrating data from another tool.
04Photo-scan a handwritten list
If your leads live on paper (handwritten lists from a trade show, clipboard from a job site, sticky-note pile), Conduit reads it.
- Go to Settings → Import Data.
- Click Scan Handwritten List.
- Take a photo or upload one. Phone camera works fine; rear camera with good light is best.
- The AI reads the handwriting and extracts names, phone numbers, emails, and addresses into a review table.
- Review every row. Bad handwriting or unusual spellings can trip the OCR. Fix anything wrong.
- Confirm to import.
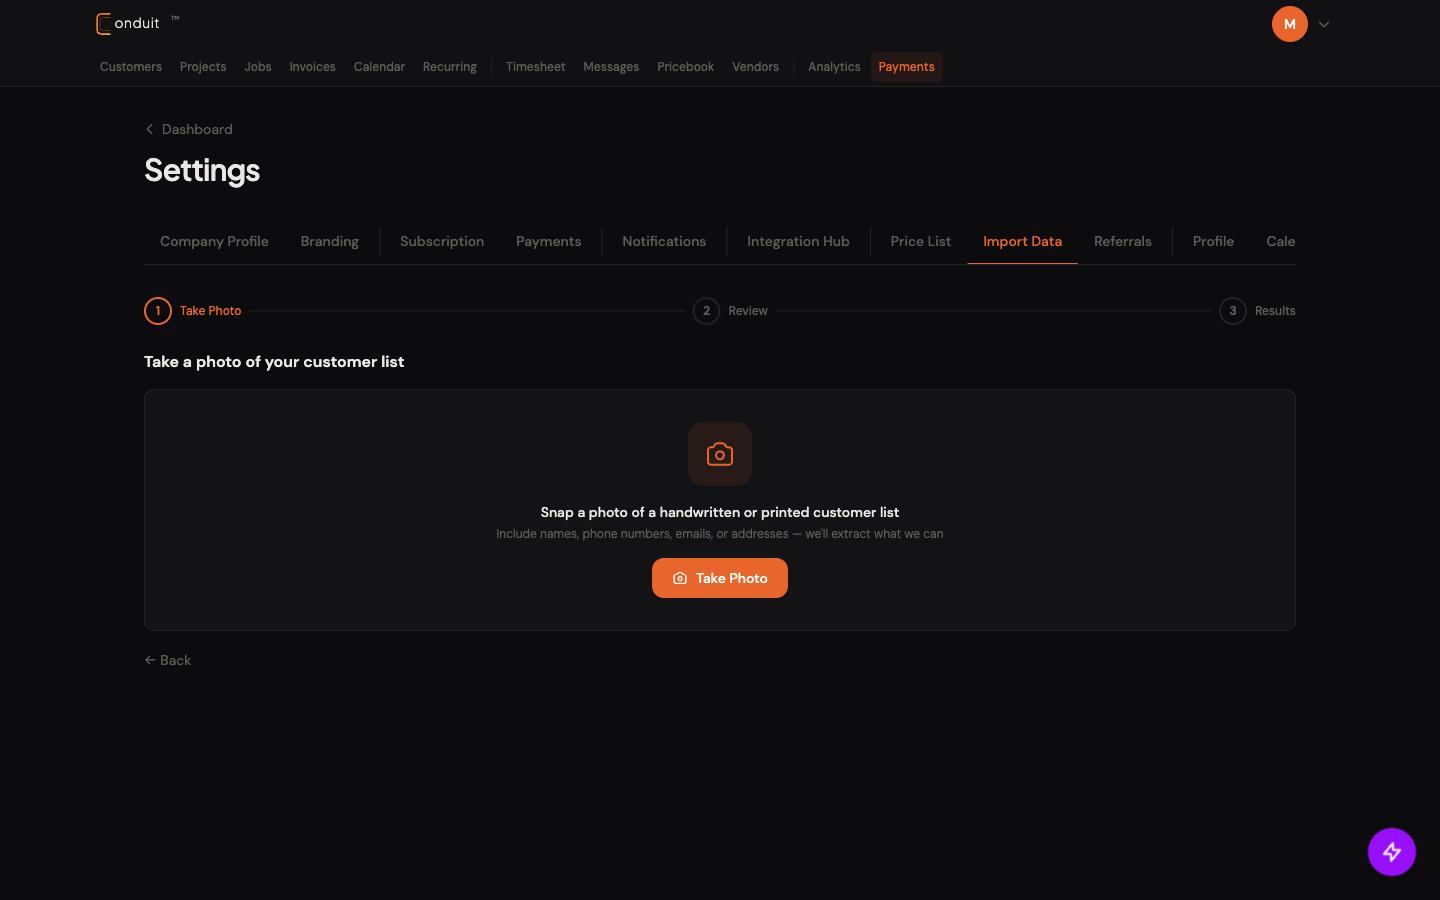
- 1. Take Photo step
- 3. Drop zone or camera target
- 3. Take Photo button
It handles messy handwriting better than you would expect, but always double-check before confirming. Treat the OCR output as a starting point, not the final answer.
05The customer detail page
Click any customer in the list to open their detail page. This is where you edit, archive, or drill into their projects and jobs.
- Name + status badge + customer type. At-a-glance identification.
- Total spent + outstanding. Lifetime revenue and what they owe right now.
- Edit + Archive. Top-right actions. Archive moves them to the bottom of the list with a red status dot; they don’t disappear.
- Tabs: Details / Projects / Jobs (with counts). Click between to see contact info, every project, or the full job history.
- Contact + Details cards. Phone, email, preferred contact, address, primary technician, customer type, lead source, customer-since date.
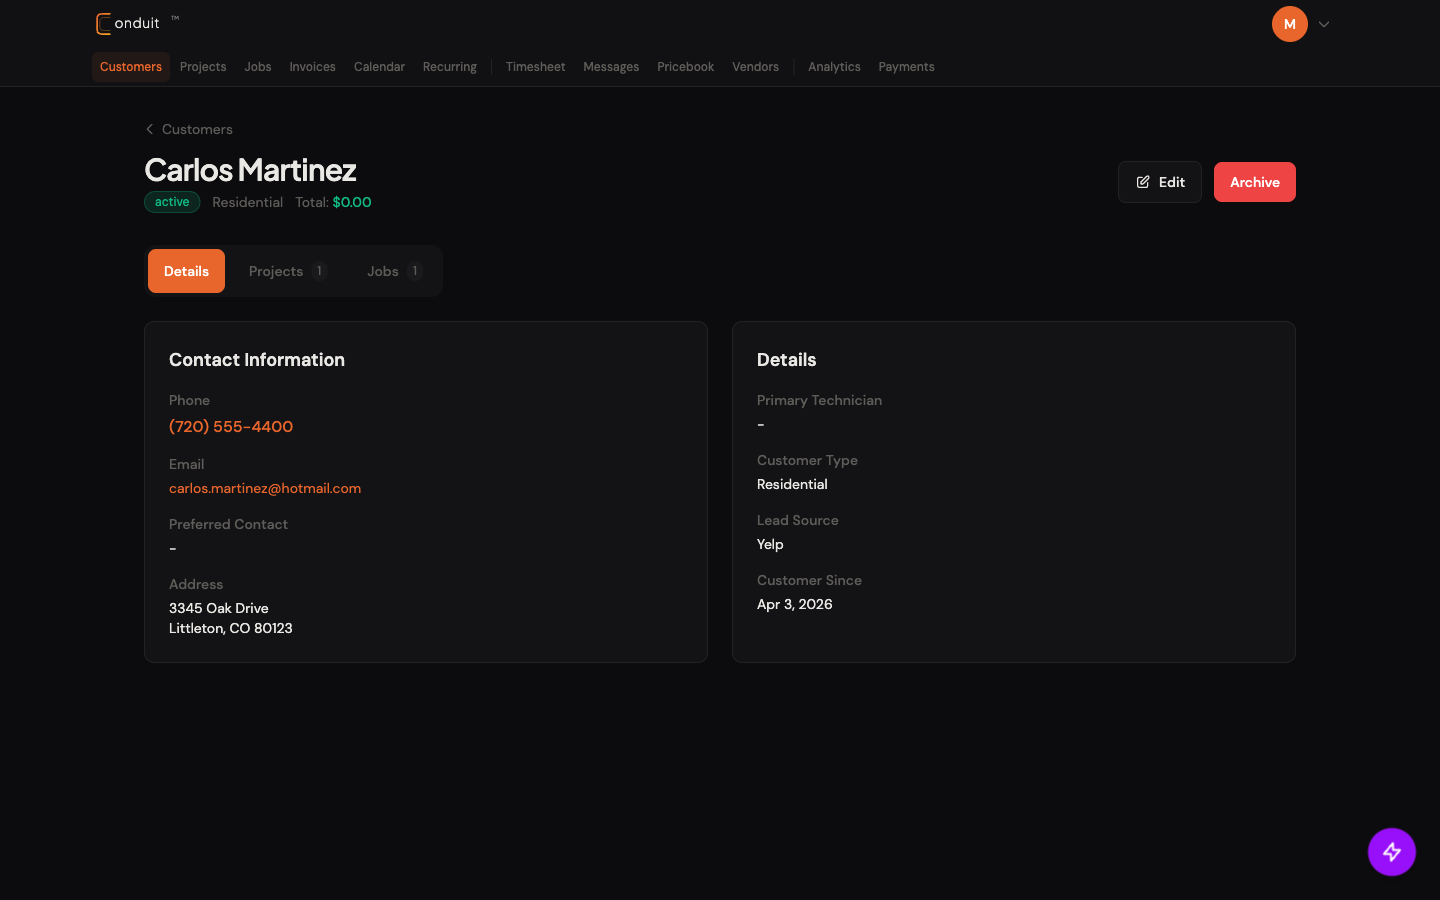
- 1. Name + badges
- 2. Total + outstanding
- 3. Edit + Archive
- 4. Tabs (Details / Projects / Jobs)
- 5. Contact + Details cards
If a customer has no project yet, the Projects tab shows a prompt to create one. Most work in Conduit nests under projects, so this nudge is intentional.