The first guide in this category, Job → Invoice → Payment, walked the loop end-to-end. This one goes deep on the invoicing side: discounts, tax, margin tracking, partial payments, overdue handling, and Stripe Connect.
01Create a standalone invoice
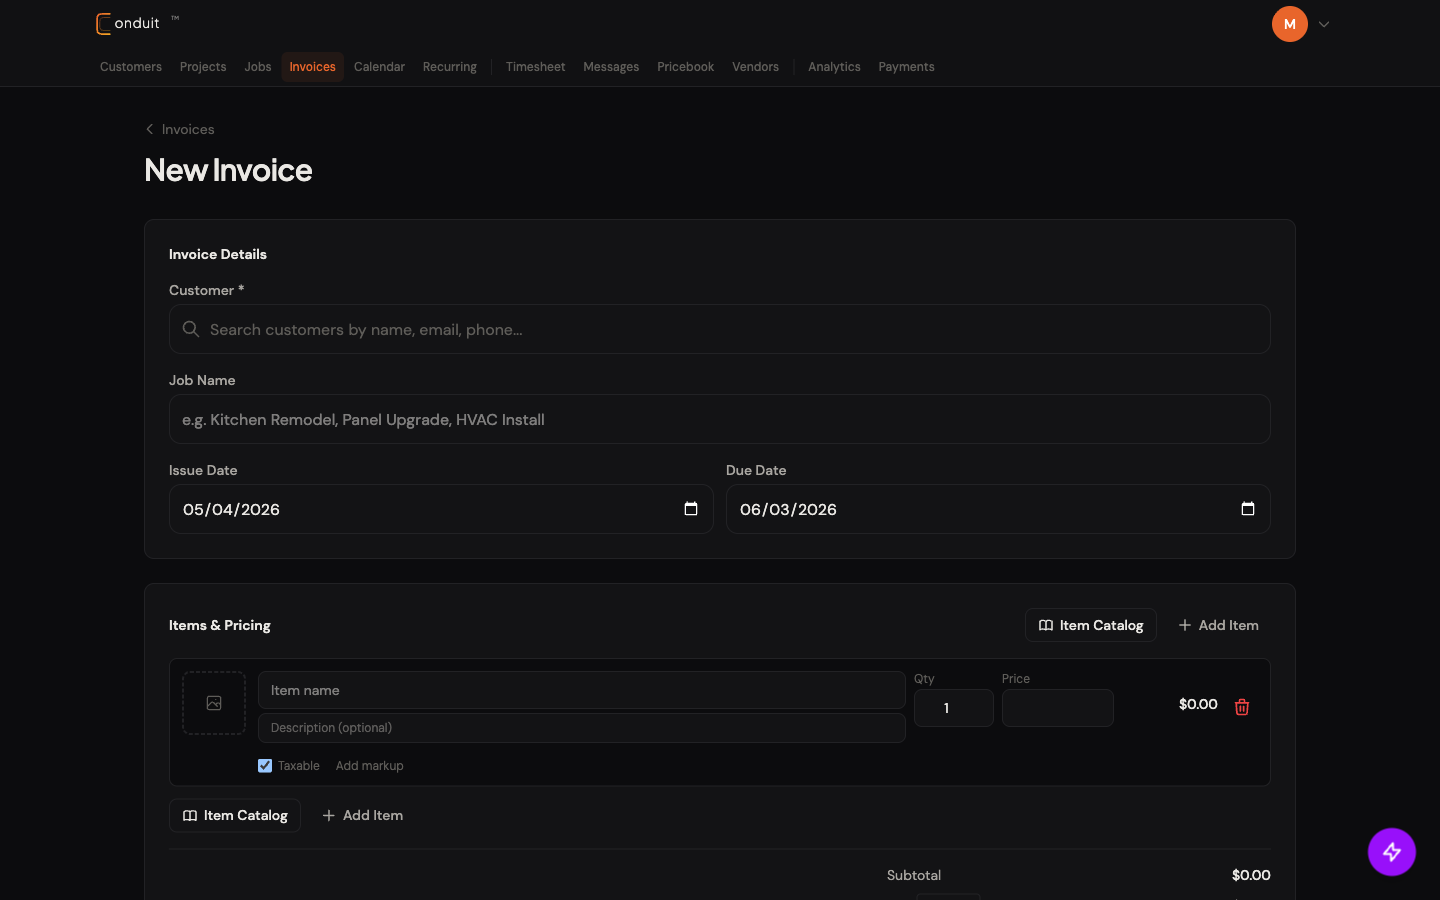
Most invoices come from a completed job, but you can also create one directly. From the Invoices page, click + New Invoice. The form has two halves — details up top, totals down below — and the totals update live as you type prices and toggle Taxable on each line.
Top of the form: who, what, when
- Customer. Required. Search by name, email, or phone.
- Job Name. Optional label for context (e.g., “Kitchen Remodel”). Useful when the same customer has more than one job.
- Issue & Due dates. Issue defaults to today, Due defaults to 30 days out. Override either per-invoice.
- Item Catalog. Pull pre-priced items from your pricebook.
- + Add Item. Type a custom line in-place when the work isn’t in the catalog yet.
- 1. Customer search
- 2. Job Name
- 3. Issue + Due dates
- 4. Item Catalog (pull from pricebook)
- 5. + Add Item (custom line)
Bottom of the form: how much
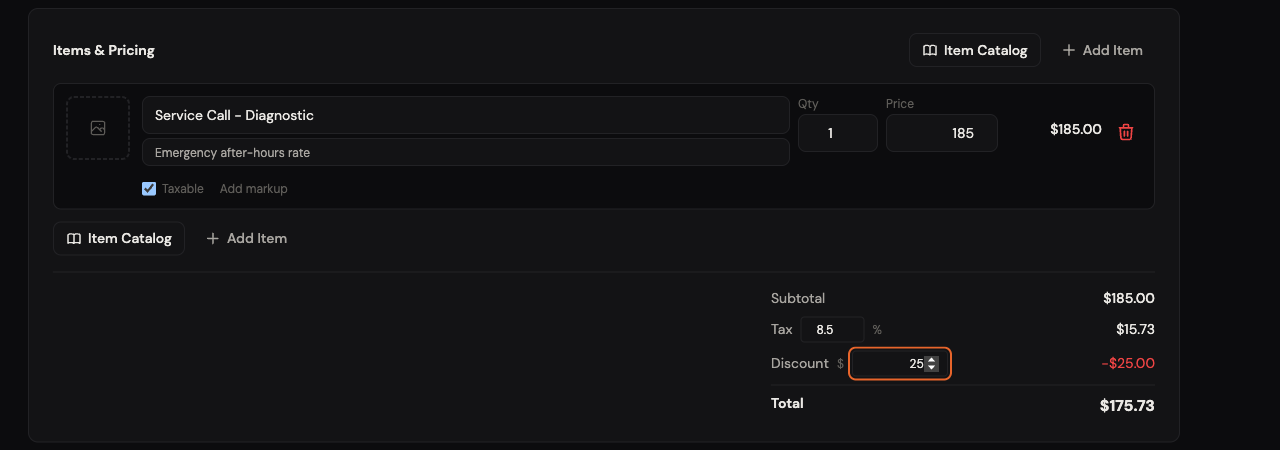
Below the line items, the totals stack updates live as you fill prices in.
- Subtotal. Sum of every line. Read-only — driven by the line items above.
- Tax %. Applied only to lines with the Taxable toggle on. Set the rate once per invoice; the dollar figure recalculates as you type.
- Discount. Optional flat dollar amount. Subtracts from the subtotal before tax — useful for goodwill credits or promised price-matches.
- Total. Subtotal + tax − discount. This is what your customer will owe.
- 1. Subtotal (auto-calculated)
- 2. Tax % input (rate per invoice)
- 3. Discount $ input (flat)
- 4. Total — what the customer owes
When the totals look right, click Create & Send to push it out, or Save Draft to come back to it later.
02Margin tracking (internal only)
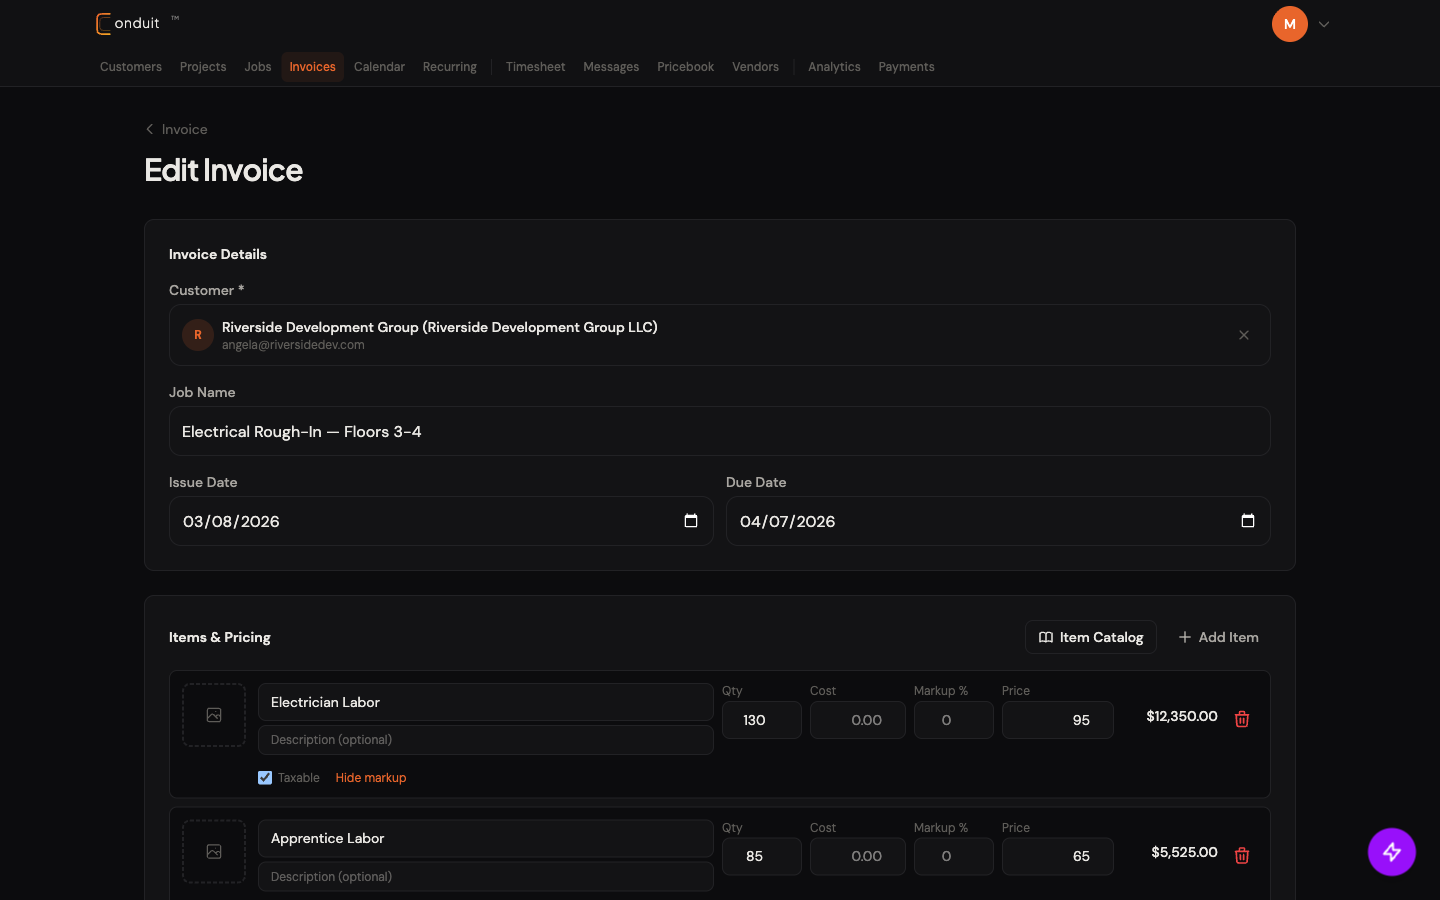
Click Add markup on any line item to expose two extra columns — Cost and Markup % — that let you track margin without your customer ever seeing it. Pricebook items with pre-set costs auto-fill these; on custom lines, type the cost yourself.
- Cost. What you paid for materials or labor on this line. Type it in directly, or pre-set it on the pricebook item so it auto-fills.
- Markup %. Your margin on the line. When you set Price, this calculates automatically; when you set Markup %, Price calculates instead. They stay in sync.
- Price. What your customer sees on their invoice. The Cost and Markup columns are hidden from the customer-facing view.
- Hide markup. Collapses the two extra columns when you don’t need to see them. The values stay; they’re just hidden from view.
These line-level margins roll up to per-invoice, per-project, and per-customer P&L. See Analytics & P&L for how it aggregates.
- 1. Cost (your true cost per unit)
- 2. Markup % (your margin)
- 3. Price (what customer sees)
- 4. Hide markup link (collapses columns)
03Send and track
The invoice detail page is the hub for everything send-related.
- Send via Text. SMS with link to the payment portal.
- Send via Email. Email with link + PDF attached.
- QR code. For in-person handoff at the job site.
- Public link. Copy and share manually.
- Send count. Tracked per channel. You always know what went out and when.
04Customer payment portal
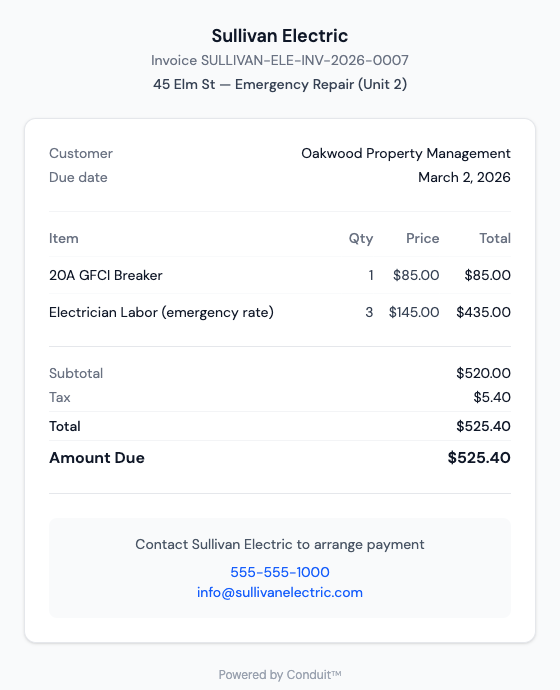
Open the public link in an incognito window to see exactly what your customer sees. No app to install, no Conduit account required.
- Branding. Your company name pulled from the Company profile, so customers know it’s a real invoice from you.
- Invoice number + job context. The invoice number for their records, plus the Job Name line if you set one (e.g., “45 Elm St — Emergency Repair”) so they remember what the work was.
- Customer + Due date. Who the invoice is for and when payment is expected.
- Line items. Item, quantity, unit price, line total — same data you see on the contractor side.
- Totals stack. Subtotal, Tax, Total, Amount Due. Amount Due is bolded so it can’t be missed.
- Pay Online block. Once Stripe is connected, this becomes a Pay Online button (ACH or card). Until you connect Stripe, it shows your phone and email so customers can call to arrange payment.
- 1. Your company branding
- 2. Invoice number + job context
- 3. Customer + Due date
- 4. Line items (Item / Qty / Price / Total)
- 5. Totals stack (Subtotal / Tax / Total / Amount Due)
- 6. Pay Online block (contact fallback when Stripe isn't connected)
05ACH vs card: the fee math
This is Conduit’s biggest cost differentiator versus most contractor SaaS.
| Method | Stripe processing | Conduit platform fee | Total |
|---|---|---|---|
| ACH | Capped at $5 | Flat $1 | $6 max per invoice |
| Card | 2.9% + $0.30 | 1% | ~3.9% per invoice |
On a $10,000 invoice:
- ACH: $6 total (saves you $384 vs card)
- Card: ~$390 total
Push your customers toward ACH where you can. Card is faster (2 days) but the fees compound across hundreds of invoices.
06Manual payments and partial payments
If a customer pays outside the portal (check, cash, phone), record it manually.
- Click Record Payment on the invoice detail.
- Amount. Full balance or partial.
- Method. Card, ACH, Check, Cash, Other.
- Check number if applicable.
- Notes (optional).
- Save.
Partial payments are first-class. Record what came in; the remaining balance updates. Status flips to Paid only when fully covered.
07Overdue tracking and Stripe setup
Overdue. Invoices past their due date without payment are auto-marked overdue. They show a red left border in the list, and the count + total appear in the page header. Filter to “Overdue” to see them all in one place.
Stripe setup. Settings → Payments → Connect with Stripe. Five-minute hosted onboarding flow. Once connected, every invoice you send includes the Pay Online option automatically. See Connect Stripe for payments in the Company Setup guide.
That’s invoicing. Next: Projects — the organizing container for bigger work.