Submittals are how subs formally present materials, products, or work for GC approval. Specs are the detailed item selections that live under submittals, and customers can sign off on those selections directly. Together they make sure everyone agrees on exactly what’s being used before work starts.
01Create a submittal
From a project’s Submittals & Specs tab, click + New Submittal to expand the inline form above the existing list.
- Submittals & Specs tab. Active tab on the project. Count chip shows open + under-review submittals.
- + New Submittal / Cancel. Top-right toggle. Opens this form; turns into Cancel while the form is open.
- Title. Descriptive: “HVAC Equipment, Exam Room Mini-Splits,” “Lighting fixture cut sheets,” etc.
- Description. What’s being submitted, in detail. Reviewer reads this before opening attached specs or comments.
- Spec section. Optional CSI section code (e.g., “Section 26, Electrical”). Helps GCs filter on big jobs.
- Create Submittal. Submit. Status defaults to Draft. Click Submit when the submittal is ready for GC review.
- Existing submittals. Stay visible below the form for reference while you draft.

- 1. Submittals & Specs tab
- 2. + New Submittal (toggles this form)
- 3. Title
- 4. Description
- 5. Spec section (e.g., CSI code)
- 6. Create Submittal
- 7. Existing submittals stay visible below
Use the form for the submittal record itself. Product details and selection data belong in specs attached to the submittal.
02Comment threads and discussion
Once submitted, both sides can discuss in the comment section.
- Comment thread at the bottom of the submittal detail.
- Add a comment any time. All discussion threads inline.
- Print trail is available from the comment section when you need a record of the discussion.
The conversation history stays on the submittal, not in email or text, so anyone joining the project later has context.
03Approve, reject, or request resubmission
GC view: submittals from every sub on the project land in one aggregated list. Approve and Reject are inline actions on each row. A short review note field appears before you confirm the decision. The review timestamp and reviewer name are tracked automatically (no “I never approved that” disputes).
- Sort toggle. Date (newest first) or Contractor (group by sub).
- PDF + + New Submittal. Top-right actions: PDF exports the list; + New Submittal opens the form from tab 01.
- ‘under review’ badge. First submittal’s status, opened by GC but no decision yet.
- Cross-company attribution. “by Fairfield HVAC Services” tells you which sub submitted it. Subs only see their own submittals.
- Approve / Reject inline. Per-row actions. Click Approve or Reject directly without opening the submittal detail.
- + Add Spec. Create a child spec under this submittal. Useful when the submittal is for a customer-selected item.
- Discussion / Comments. Open the comment thread for back-and-forth before deciding.
- ‘submitted’ badge. Second submittal’s state, newly submitted and not yet under active review.

- 1. Sort by Date / Contractor
- 2. PDF + + New Submittal
- 3. 'under review' badge
- 4. by Fairfield HVAC Services
- 5. Approve / Reject inline
- 6. + Add Spec to attach product detail
- 7. Discussion / Comments
- 8. 'submitted' badge from Northeast Plumbing
For longer reviews where you need to ask follow-up questions, use Discussion / Comments first; the inline Approve/Reject is best when the answer is clearly yes/no on first read.
04Specs: child records under submittals
Specs are customer-facing item selections, but they do not float on their own. Every spec belongs to a submittal. From a submittal row in the Submittals & Specs tab, click + Add Spec to create one or more spec items under that submittal.
- Parent submittal. The spec inherits the project context from the submittal row where you clicked + Add Spec.
- Customer. Required for the customer-facing selection link.
- Title. Descriptive: “Updated Kitchen & Bathroom Spec,” “Light Fixture Selections,” etc.
- Link to Bid. Optional. Use this when confirmed selections should flow into a bid (covered in tab 06).
- Notes. Customer-facing context they’ll see when reviewing selections.
- Upload Spec PDF. Fast mode, for when you have an existing spec document.
- Build Spec Manually. Interactive mode, where Conduit walks you through rooms, groups, and options.
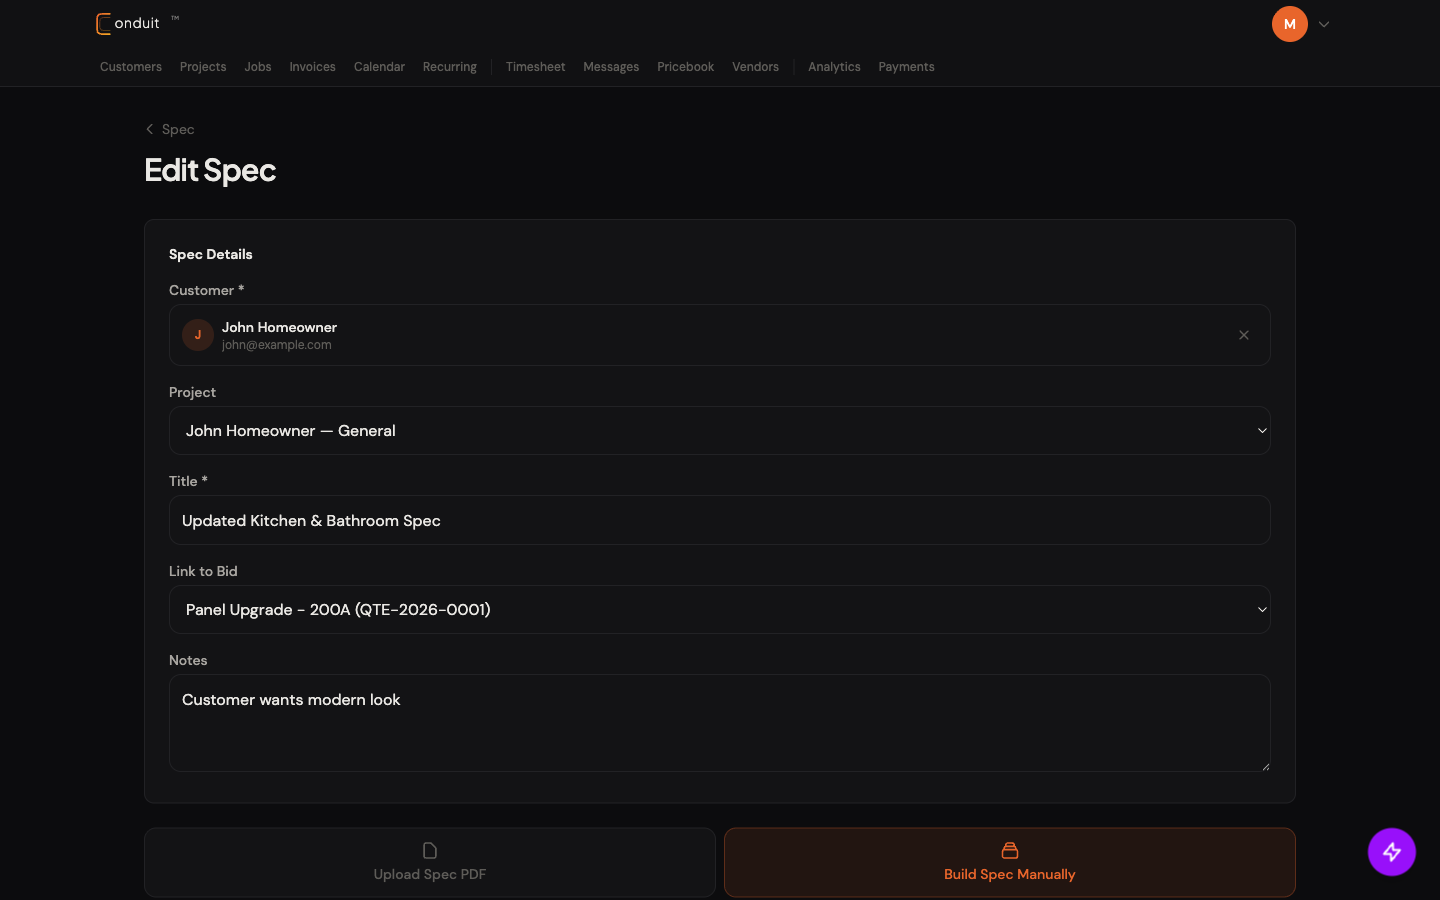
- 1. Customer locked from picker
- 2. Project from parent submittal
- 3. Title
- 4. Link to Bid (selections will flow here)
- 5. Notes (visible to customer)
- 6. Upload Spec PDF
- 7. Build Spec Manually
What the two build modes do
PDF mode is for when you already have a spec doc. Upload it, share the link with the customer, and the customer reviews.
Manual mode walks you through three nested levels:
- Rooms (Kitchen, Master Bath, Living Room, etc.), the top level.
- Groups within each room (Flooring, Paint Color, Lighting, Fixtures), the categories.
- Options within each group, organized into three price tiers: Budget (entry-level), Mid-Range (middle), Premium (top-tier). Each option has a name, description, photo, and price.
Manual mode gives the customer clear choices at every price point.
05Customer selection
Click Share with Customer on a saved spec. The customer gets a link.
- Customer’s view: clean browse-and-select interface organized by room.
- Per group, they pick one option. Selections highlight in orange.
- Real-time updates. Both sides see selections as they happen.
- Confirm when all groups have a selection. Locks in the choices.
You see exactly what the customer picked, with photos, prices, and notes.
06Apply selections to a bid
Once the customer confirms their picks, the spec detail page shows the result and gives you the action that closes the loop. Apply to Bid pushes every confirmed selection into the linked bid as a fresh line item. No manual re-entry, the bid total reflects selections immediately.
- Confirmed status. Green chip + “by [user] · [date]” attribution. Means the customer locked in selections.
- Apply to Bid. Orange button. Pushes selections into the bid linked in tab 04. Confirmation dialog asks which bid if more than one is linked.
- Shopping List. Icon button next to Apply. Exports the selections as a shopping list (PDF) for the field team or supply house.
- Selected Total. Sum of every confirmed selection ($2,874.00 in this example). Updates as customer picks.
- Notes. Customer-facing notes from tab 04, surfaced here for context.
- Linked Bid card. Card with a View Bid link, so you can jump straight to the bid the selections will flow into.
- Room sections. Each room (Kitchen, Bathroom, etc.) expands below to show the picked options at full detail.
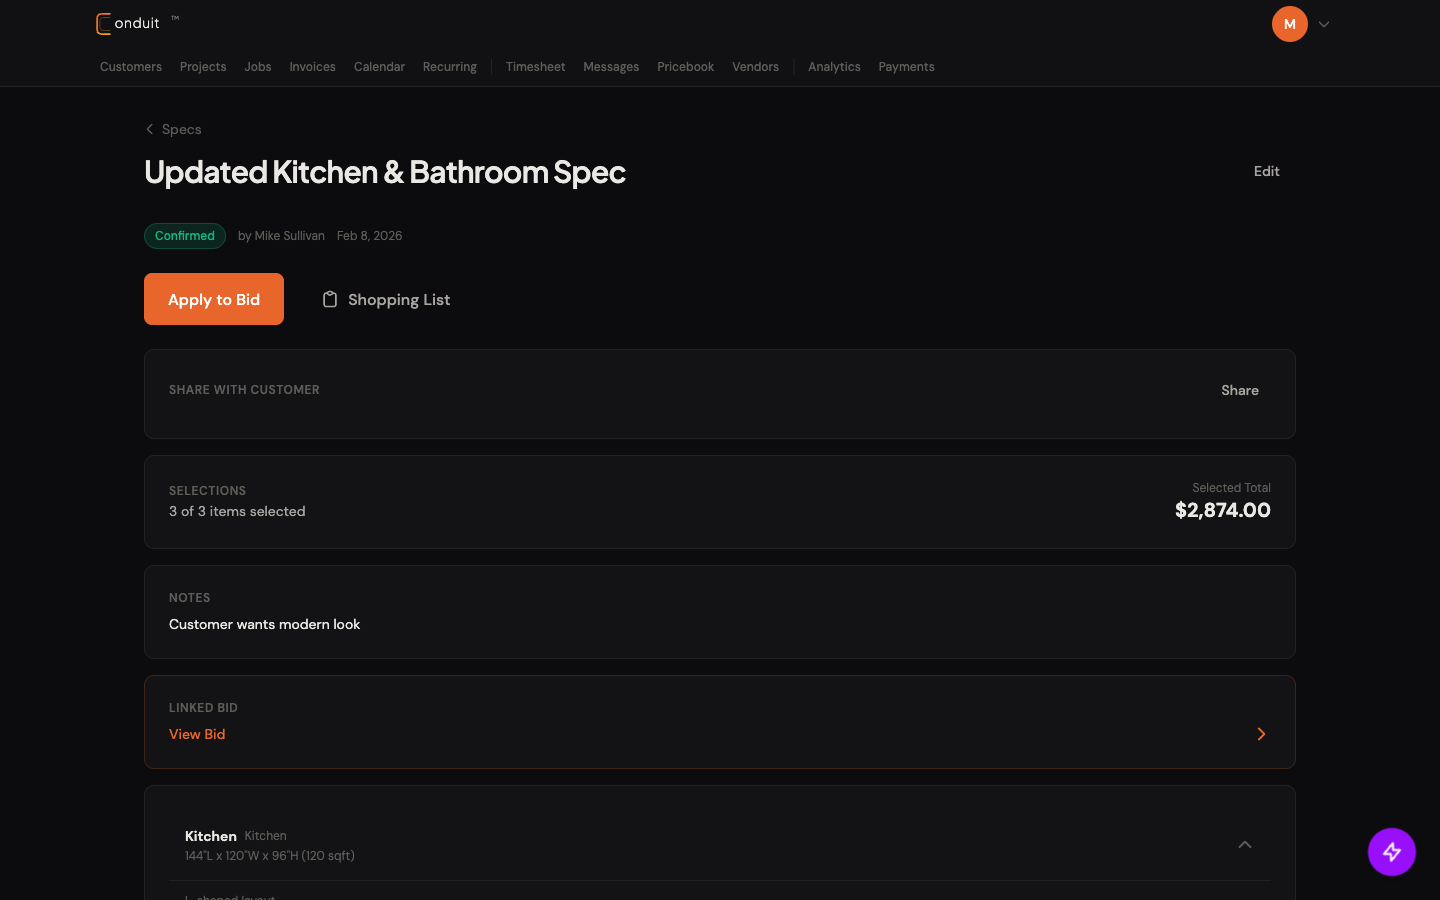
- 1. Confirmed status
- 2. Apply to Bid (creates bid line items)
- 3. Shopping List export
- 4. Selected Total ($2,874.00)
- 5. Notes (customer-facing)
- 6. Linked Bid card, View Bid
- 7. Room sections expand below
07How specs stay tied to submittals
Specs are always tied to submittals. If a spec is created without an explicit submittal, Conduit creates a draft parent submittal in the same project context so the spec still has a review home.
- From the submittal row, click + Add Spec.
- Create one or more specs under the same submittal when the review needs multiple item details.
- GC sees each spec link directly on the submittal during review.
- One click opens the spec detail from the submittal.
This is especially useful when the submittal is for an item the customer chose. The GC reviewing can see exactly what was picked, at what price tier, directly from the submittal.
That’s submittals and specs. Next: Change Orders for tracking customer-initiated scope changes.