Before you start running real work through Conduit, take ten minutes to configure your company profile, invite your team, pick permission tiers, and (optionally) connect Stripe for payments. The information you enter here shows on every invoice, bid, and customer-facing page, so it’s worth getting right.
Walk each tab in order. You can always come back; everything saves on its own.
01Open Settings
From the dashboard, click your avatar in the top-right corner. In the dropdown that appears, choose Settings.
- Avatar. Your initial in an orange circle, top-right.
- Settings. Second item in the dropdown, below Profile. Goes straight to the Company Profile tab.
- 1. Avatar
- 2. Settings
The Settings page opens with the Company Profile tab selected by default. If it isn’t, click it.
02Fill in your company profile
Six fields matter for v1. Everything else is optional.
- Logo. Click Upload Logo and pick a square PNG, JPG, or SVG (max 5MB). Appears on every invoice, bid, and customer payment page.
- Company name. Used everywhere your customers see Conduit.
- Phone and email. Your business contact info, shown on customer-facing PDFs.
- Timezone. Affects every job time, calendar, and timesheet across the app. Pick the one your office actually operates in, not the one your laptop is set to.
- Address, license number, license state. Required for legal footers on invoices and bids in most US states.
- Default tax rate. Auto-fills on every new bid and invoice. Override per-record when needed.
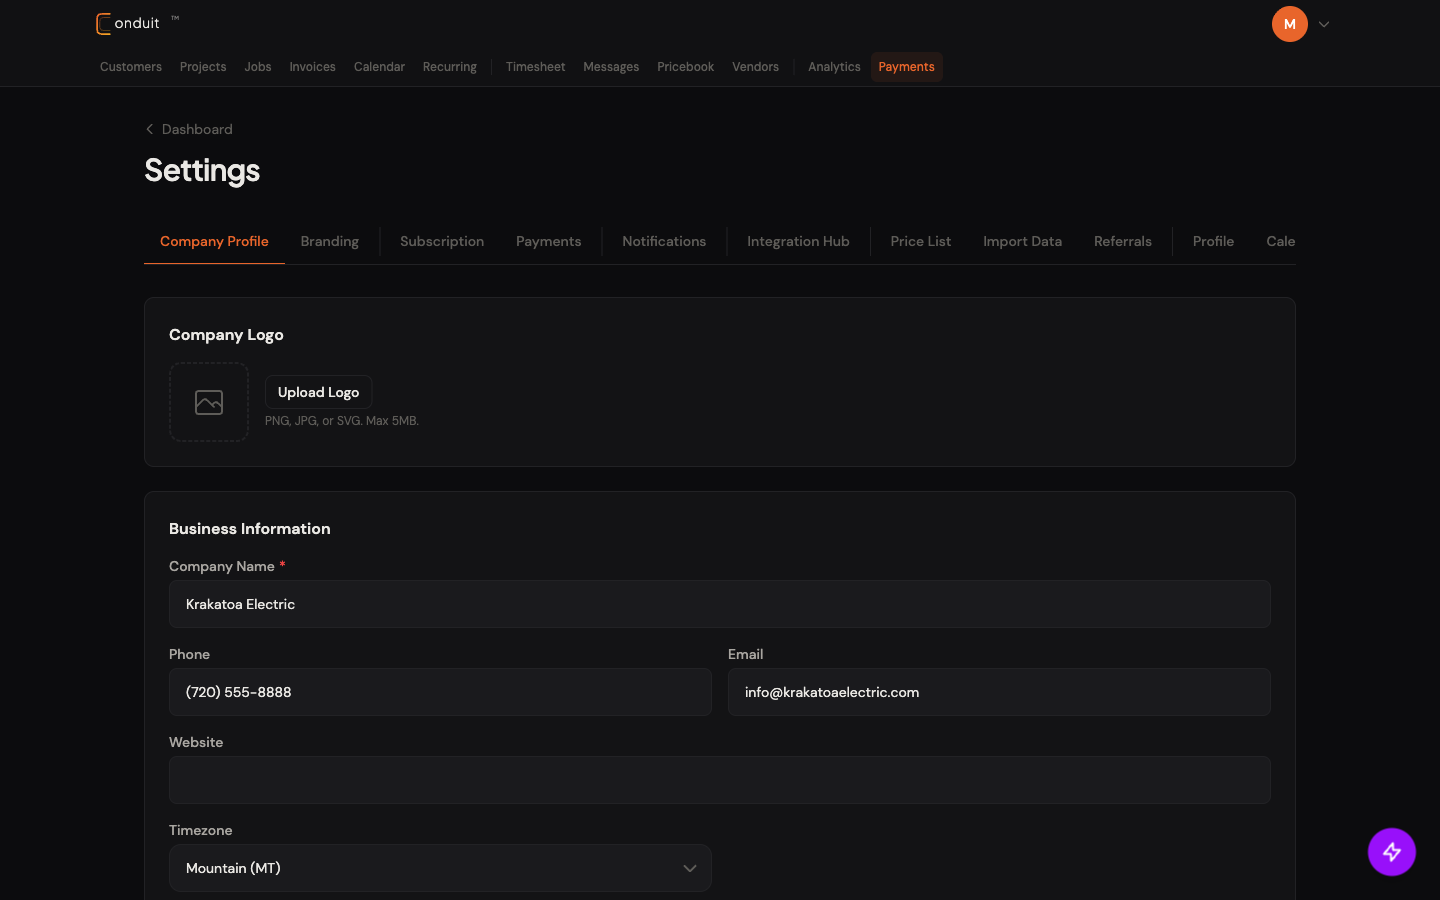
- 1. Logo upload
- 2. Company name
- 3. Phone + email
- 4. Timezone
Trade types (Electrical, Plumbing, HVAC, GC, etc.) live further down. Pick one or more; this drives bid-generation AI and plan parsing later.
03Invite your team
Open Team from the avatar dropdown (or the profile icon’s dropdown menu). Click the orange + Invite button at the top right.
- Title. “Team” with a count of current members.
- + Invite. Top-right button. Opens the invite modal.
- Tabs. Members / Permission Tiers / Audit Log. Members is the default.
- Members table. Avatar, name, email, role badge, status. Click any row to drill in.
- Role badge. Owner (purple), Manager (blue), Technician (gray), Admin (orange). Sets default permissions; the tier matrix can be overridden per-role on the next tab.
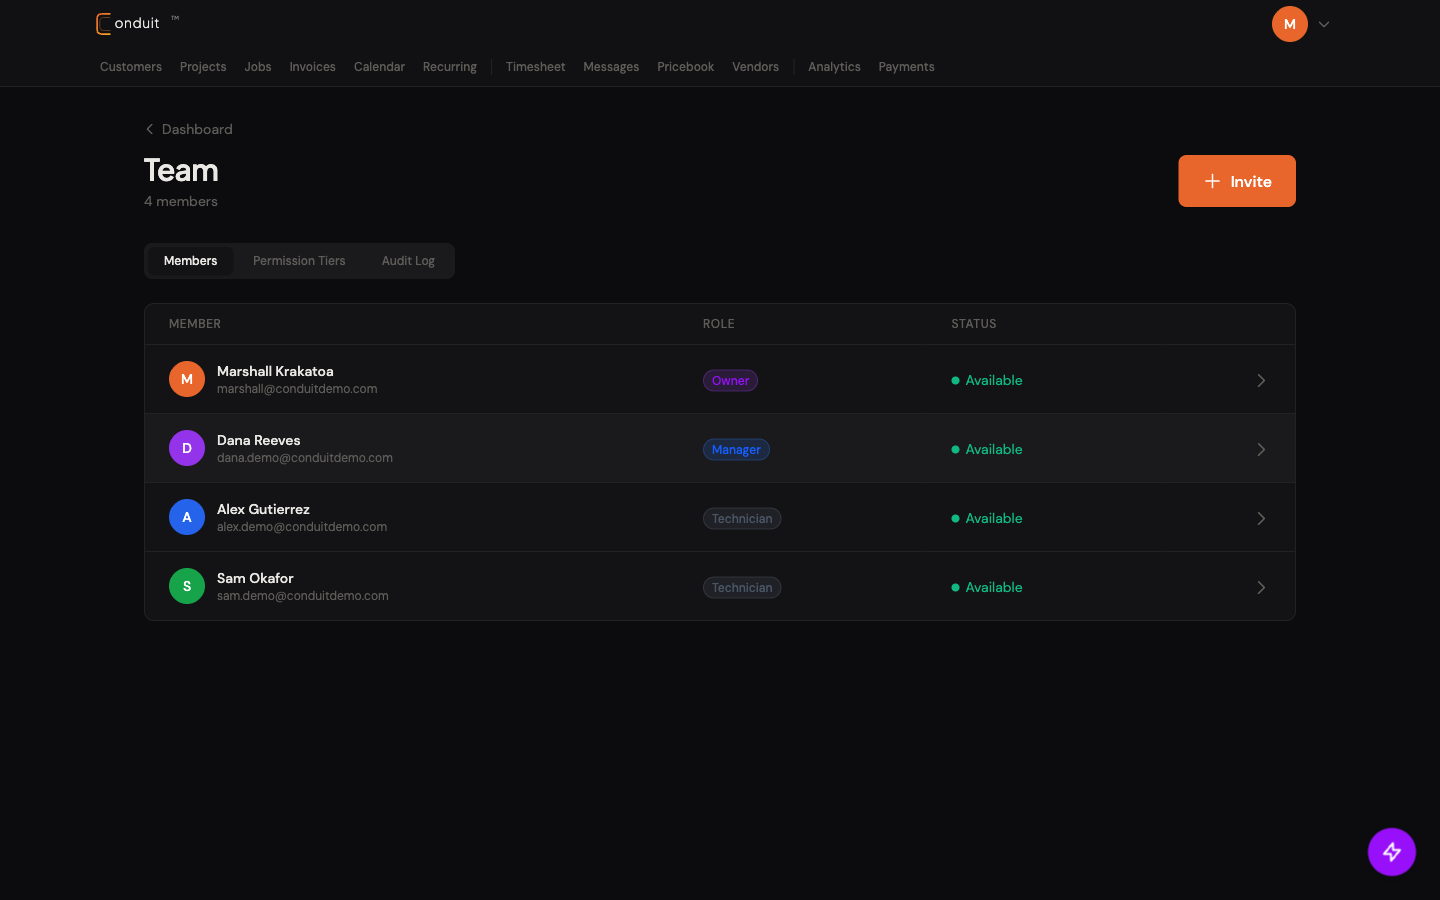
- 1. Title + count
- 2. + Invite
- 3. Members / Permission Tiers / Audit Log
- 4. Member row
- 5. Role badge
For each invite: enter their email, pick a role (Technician for field workers, Manager for jobs/invoices/scheduling, Admin for full configuration, Owner for everything plus billing), and send. The email expires in 7 days. Once they accept, they show up here with their role badge and an availability status.
04Understand permission tiers
The Permission Tiers tab shows a matrix: every capability across every role. Customize what each role can do, save changes, and the rules apply server-side immediately.
- Permission Matrix. The capability table. Rows are capabilities, columns are roles.
- Save Changes. Top-right. Disabled until you make a change.
- Capability sections. Scheduling, Customers & Projects, Bids & Invoices, etc. Grouped so the matrix doesn’t feel like 50 unrelated rows.
- Roles. Technician / Manager / Admin / Owner. Each role gets a column.
- Capability rows. “View company calendar,” “Create and edit jobs,” “Manage recurring schedules,” etc. Check or uncheck per-role.
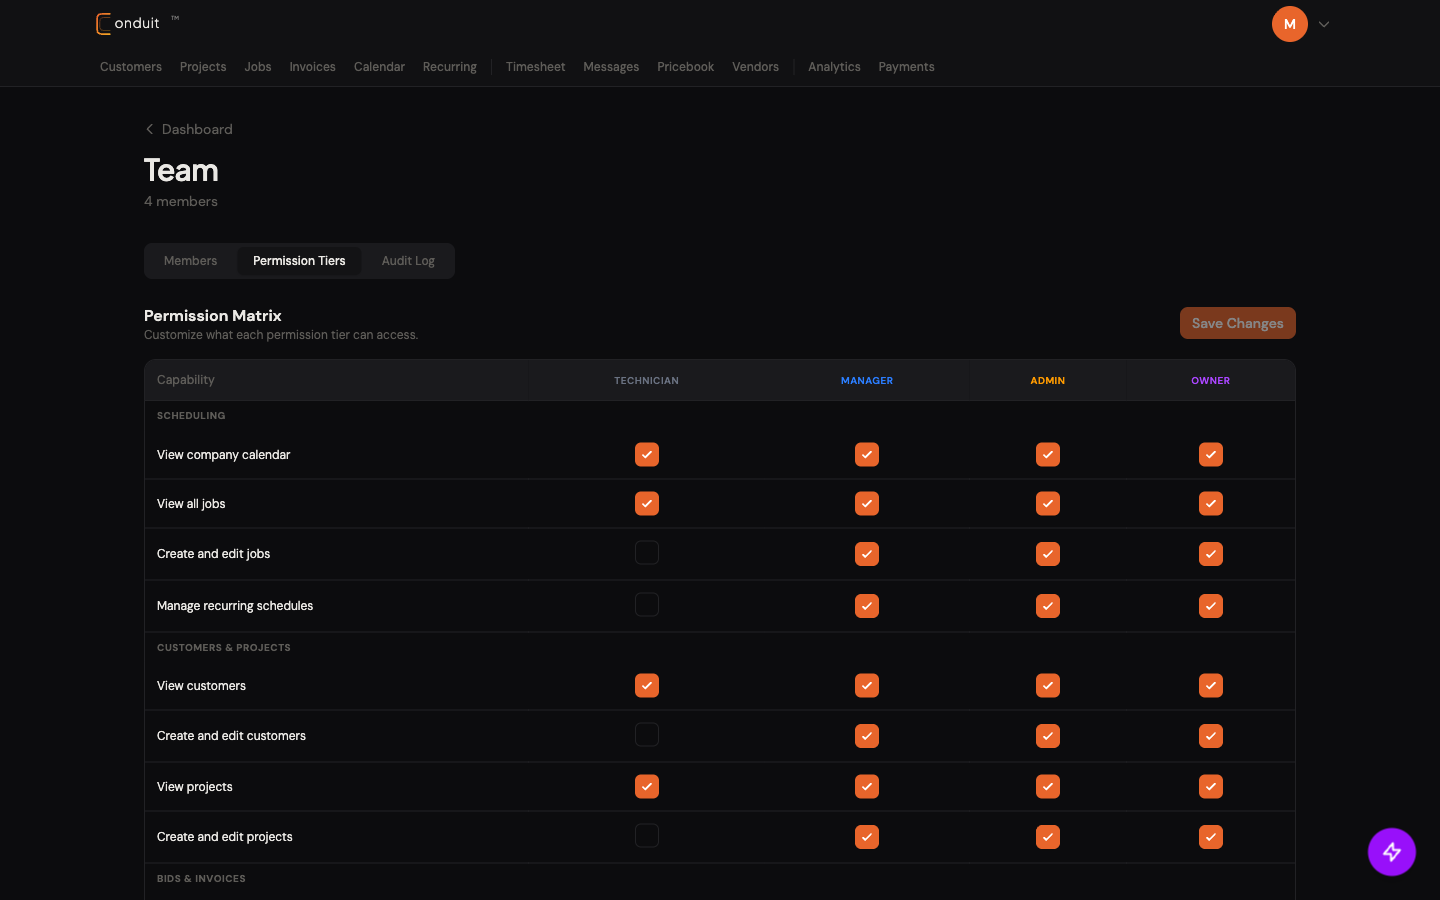
- 1. Permission Matrix
- 2. Save Changes
- 3. Capability sections
- 4. Roles
- 5. Capability rows
If you customize, default behavior:
- Technician. Sees only their own schedule, clocks in and out, uses messages.
- Manager. Adds create/edit on customers, jobs, bids, invoices. Manages team time.
- Admin. Adds settings, pricebook, payment setup, data imports.
- Owner. Adds team management and billing.
Roles stack: every higher role inherits everything below. The matrix lets you fine-tune within that.
05Connect Stripe for payments
If you want customers to pay invoices online (ACH or card), connect Stripe. Five-minute flow, then every invoice you send gets a public payment link automatically.
- Open Settings → Payments.
- Click Connect with Stripe.
- Stripe opens a hosted onboarding flow asking standard business questions (legal entity, EIN or SSN, bank account routing for payouts).
- Complete and return to Conduit. The Payments tab now shows your account is connected.
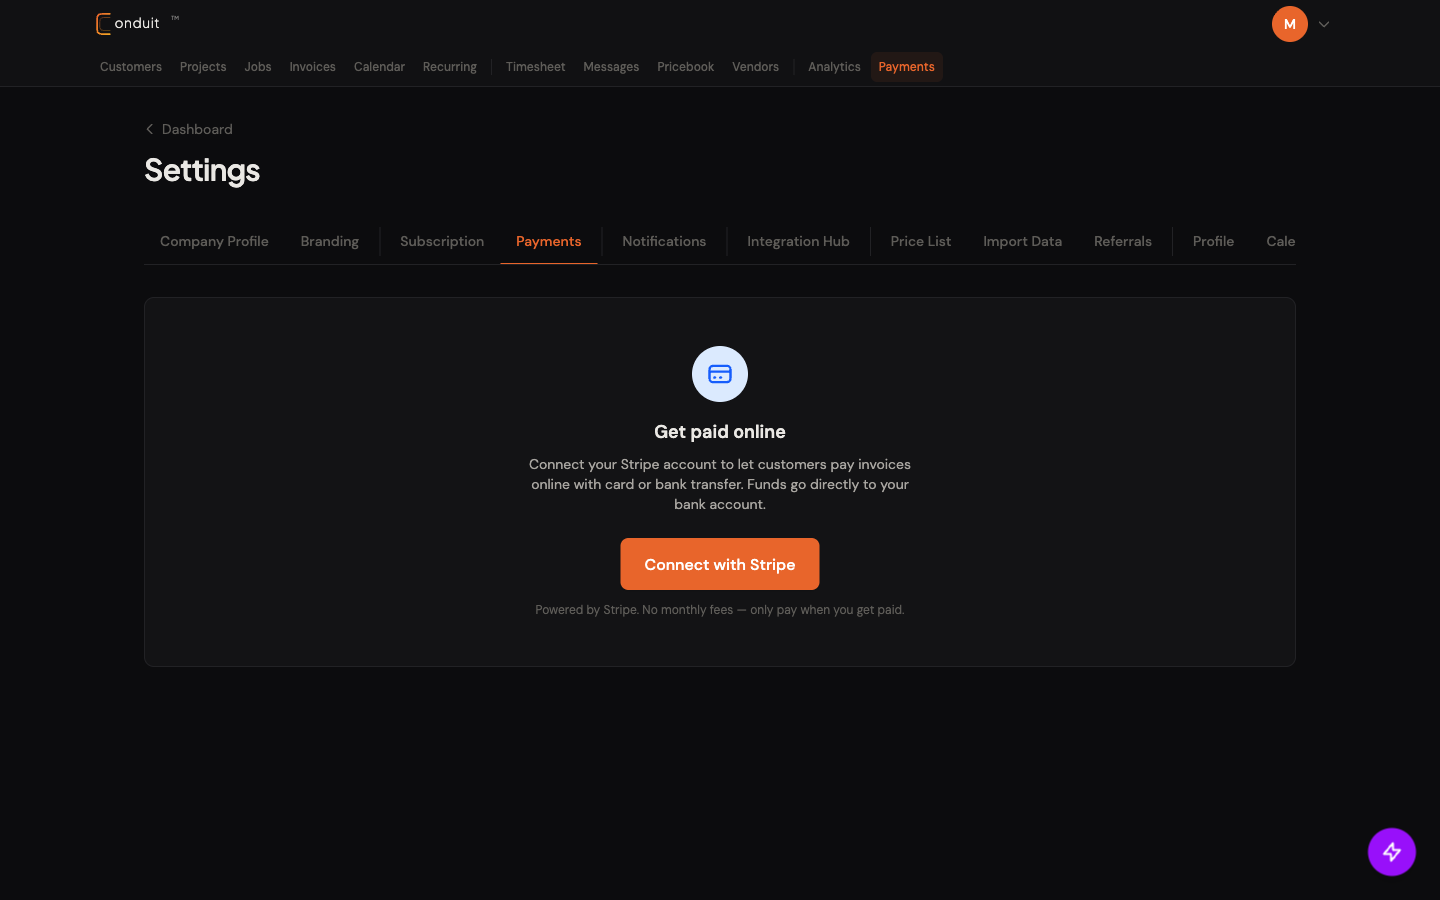
- 1. Payments tab
- 2. Get paid online
- 3. Connect with Stripe
You’re done. Time to add a customer and run your first invoice.