Conduit is the operating system for a contracting business. Customers, jobs, bids, invoices, time tracking, projects, sub-contractors, vendors, purchase orders, plans and takeoffs, P&L. One place, one login, one source of truth.
If you run a residential or commercial trade shop, this is built for you. Electricians, plumbers, HVAC, GCs, painters, landscapers, mixed trade. Owners run the office side, technicians clock into work in the field, customers see their invoices and approvals through a clean public-link experience. No app install for them.
This guide takes you from a fresh signup to your first invoice in three steps. About thirty minutes total. Click Get started below to begin.
01Set up your company
Your company profile is what your customers see on every invoice and bid PDF. Spend three minutes on this and the rest of Conduit reads “yours” instead of “default.”
Open Settings
Click your avatar in the top right of the dashboard. In the dropdown that appears, choose Settings.
- 1. Click your avatar
- 2. Choose Settings
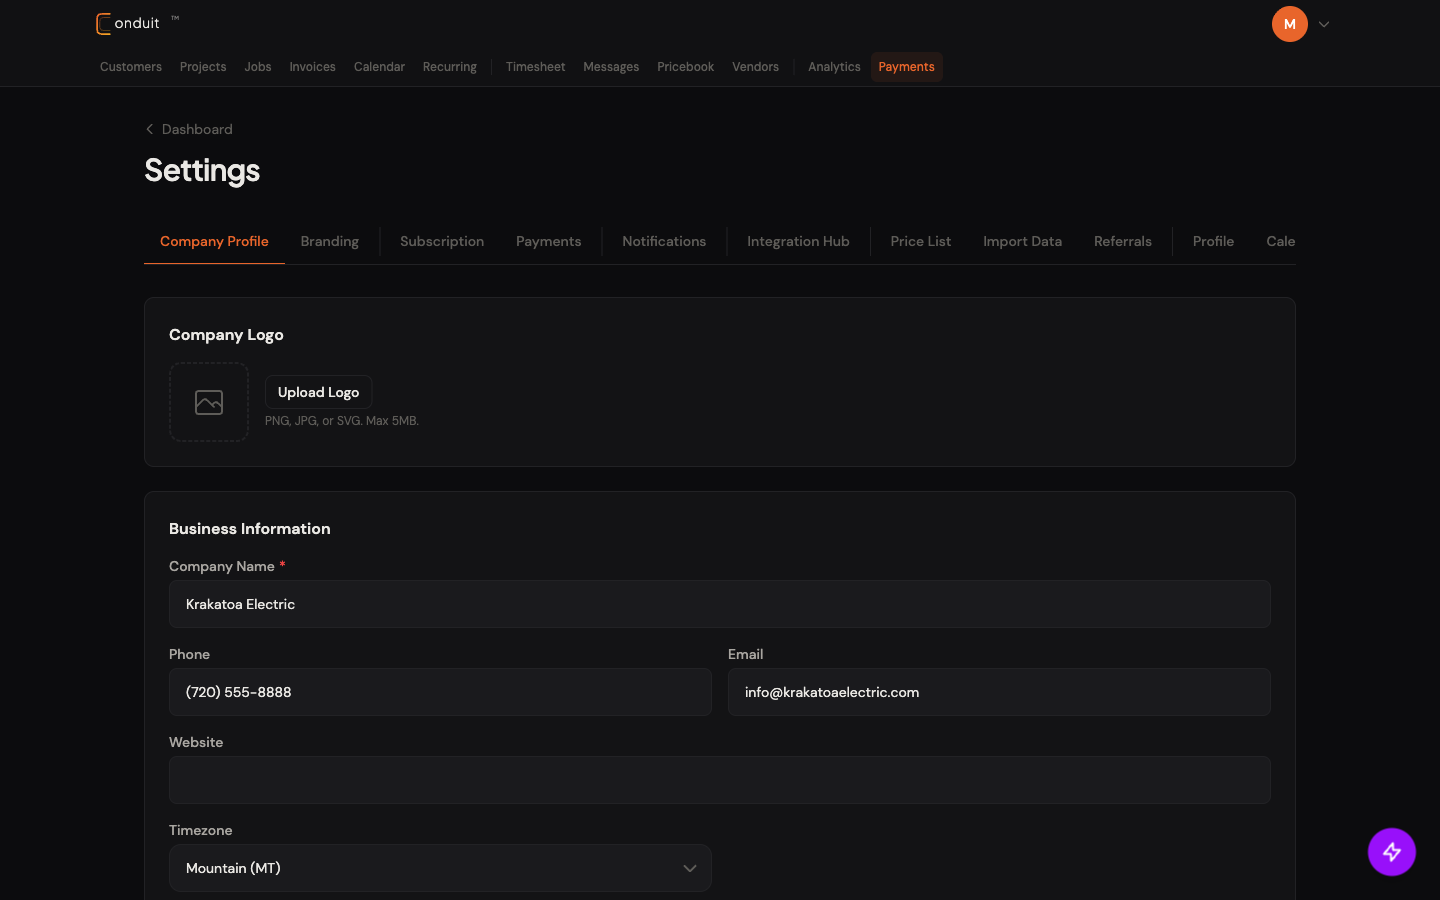
The Settings page opens with the Company Profile tab selected by default. If it isn’t, click it.
Fill in the basics
Six fields matter for v1. Everything else is optional.
- Company logo. Click Upload Logo and pick a square PNG, JPG, or SVG (max 5MB). It appears on every invoice, bid, and customer payment page.
- Company name. Used everywhere your customers see Conduit.
- Phone and email. Your business contact info, shown on customer-facing PDFs.
- Timezone. Affects every job time, calendar, and timesheet across the app. Pick the one your office actually operates in.
- Trade types. Pick one or more. Drives bid-generation AI and plan parsing later.
- License number and state. Required for the legal footer on invoices and bids in most US states.
- 1. Logo upload
- 2. Company name
- 3. Phone + email
- 4. Timezone
(Optional) Default tax rate
Scroll further down for the Default tax rate field. Setting it now means every new bid and invoice auto-fills it. You can override per-record when needed.
That is everything you need on Settings for now. Move on to the next step.
02Add a customer
Customers are the root of every other record in Conduit. You cannot create a job, a bid, or an invoice without one. The fastest path to your first invoice is one good customer.
Open Customers
Click Customers in the top nav.

- 1. Click Customers
Click Add Customer
In the top right of the customer list, click the orange + Add Customer button.
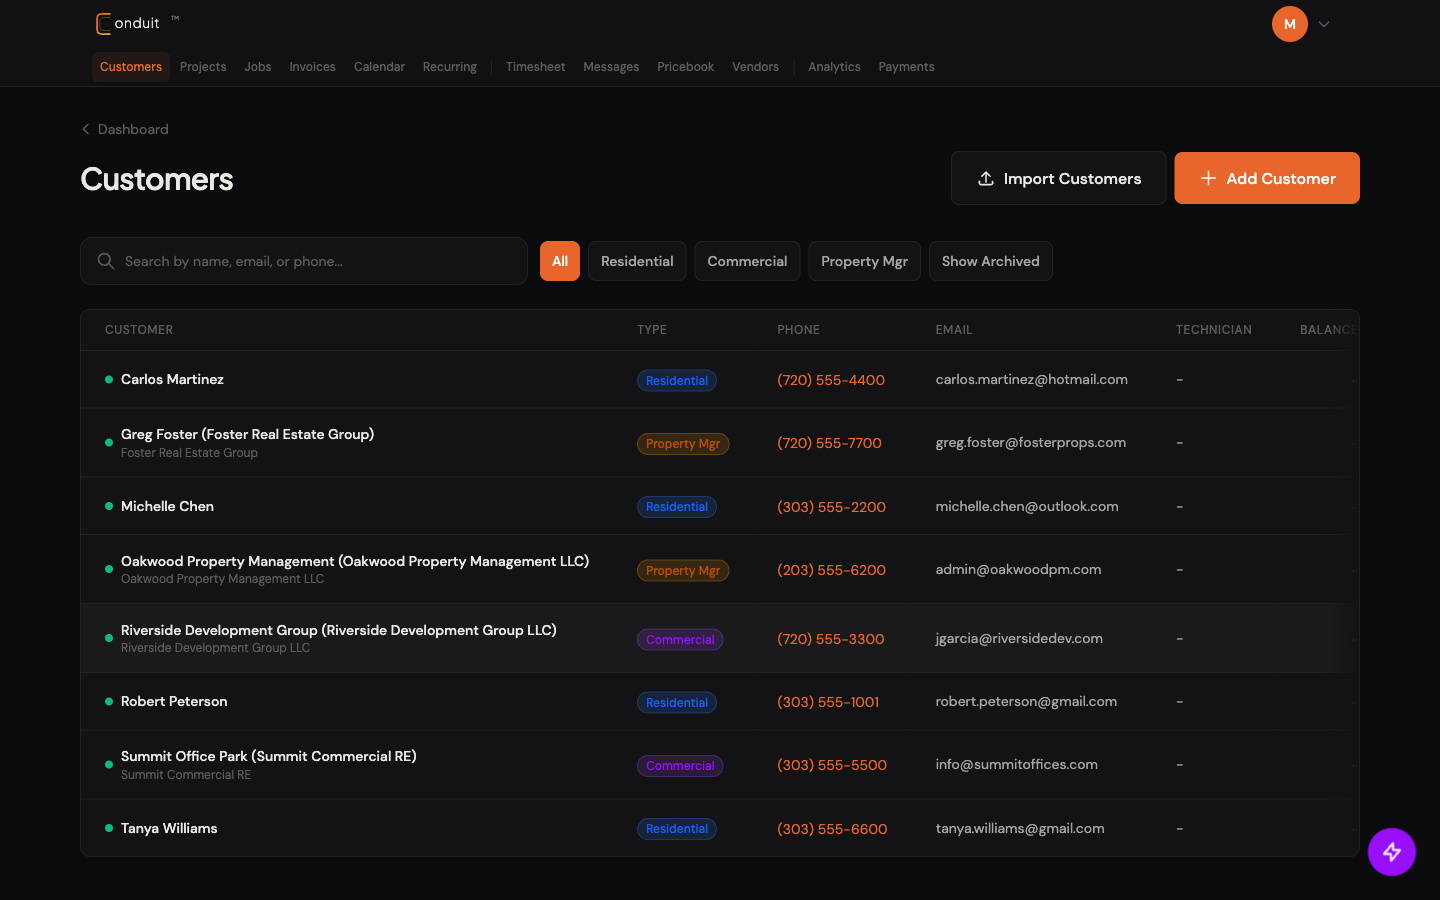
- 1. Click + Add Customer
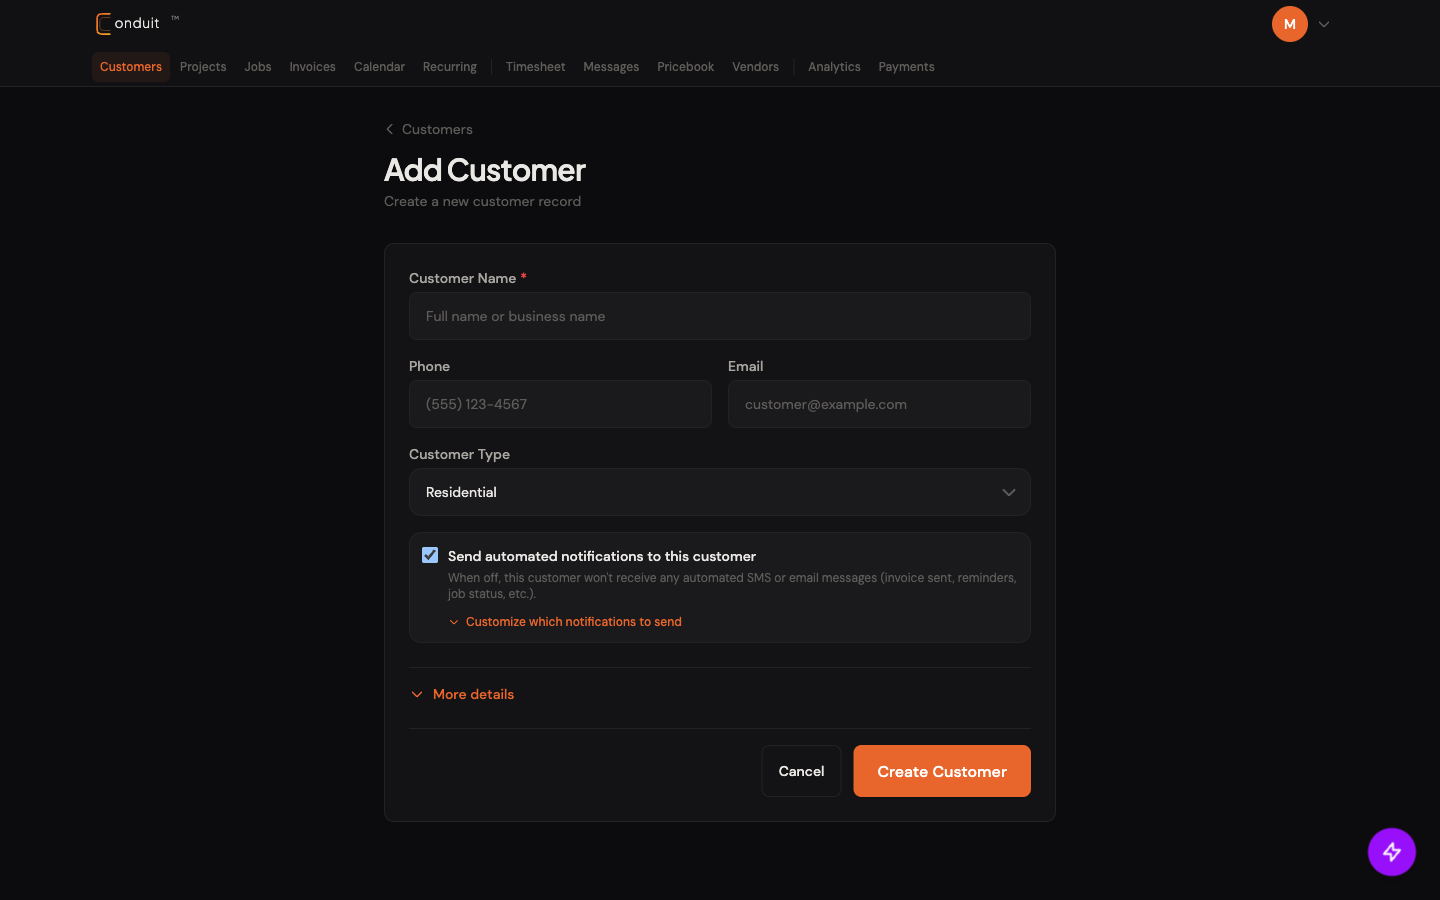
Fill in the essentials
A modal opens. Four fields matter:
- Name. First and last, or company name if commercial.
- Phone. Auto-formats as you type.
- Email. Used for invoice and bid notifications.
- Customer type. Residential, Commercial, or Property Manager.
- 1. Name
- 2. Phone
- 3. Email
- 4. Customer type
- 5. Click Create Customer
Click Save. Conduit asks “What next?” with two buttons: Add a project or Schedule a job. For your first run-through, click Schedule a job and we’ll wire that into the next step.
(Optional) Bulk import later
If you have a customer list in a spreadsheet, you can bring it in all at once via Settings → Import Data → Customers. Full walkthrough in Migrating data from another tool. Skip that for now and use the manual form for your first customer.
03Send your first invoice
You added a customer and clicked Schedule a job. Conduit dropped you on the New Job form. The shortest path to your first invoice is: schedule the job, mark it done, generate the invoice, send.
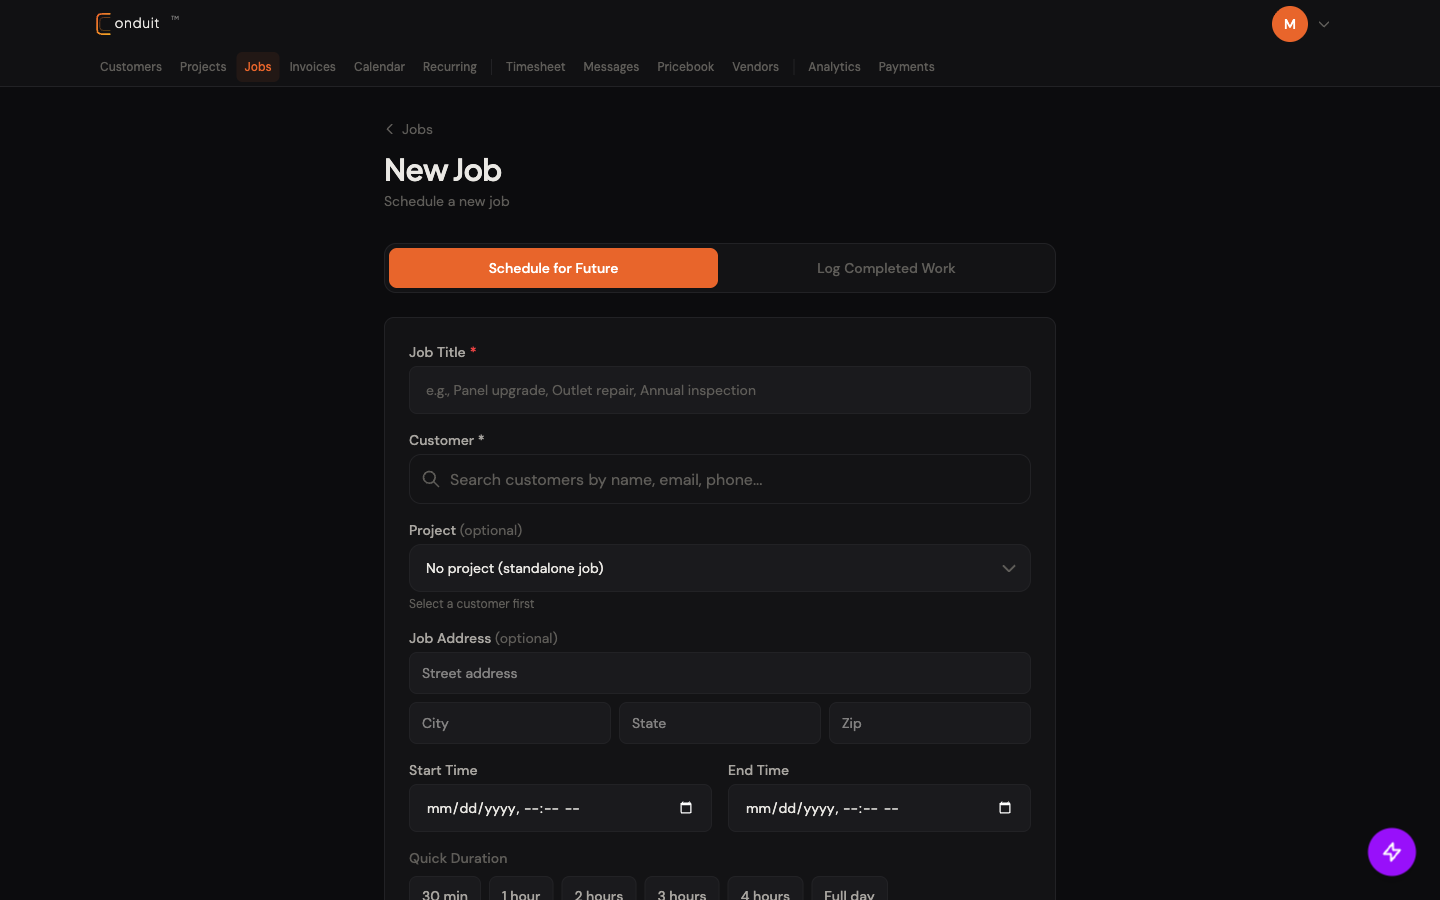
Fill in the job details
A few fields:
- Schedule for Future / Log Completed Work. Toggle at the top of the form. Pick the first if the job is in the future, the second if you’re recording work you already did.
- Job Title. What this job is. (“Service call: kitchen outlet replacement.”)
- Customer. Already pre-filled from the previous step. Otherwise, search by name, email, or phone.
- Start and End Time. When the work happens. The Quick Duration buttons (30 min, 1 hour, 2 hours…) auto-fill the end time once you set the start.
- 1. Schedule for Future / Log Completed Work toggle
- 2. Job Title
- 3. Customer search
- 4. Start and end time
Click Save Job.
Mark the job complete
Once the work is done (or right away if you’re testing), open the job from the calendar or the dashboard’s Today’s Schedule card and click Mark Complete. Conduit logs the actual completion time.
Generate the invoice
From the completed job, click Generate Invoice. Conduit pulls the job details, your saved pricebook items (if any), and tax rate into a draft invoice. Adjust line items, quantities, and notes.
Send
Click Send Invoice. Your customer receives an email with the PDF and a public payment link. If you’ve connected Stripe (Settings → Payments), they can pay by ACH or card directly from that link.
That’s it. From signup to invoice in three steps. Everything else in Conduit, projects, bids, sub-contractors, plans and takeoff, vendors, P&L, builds on top of this loop.
When you’re ready, the next guide is Dashboard and Navigation.